
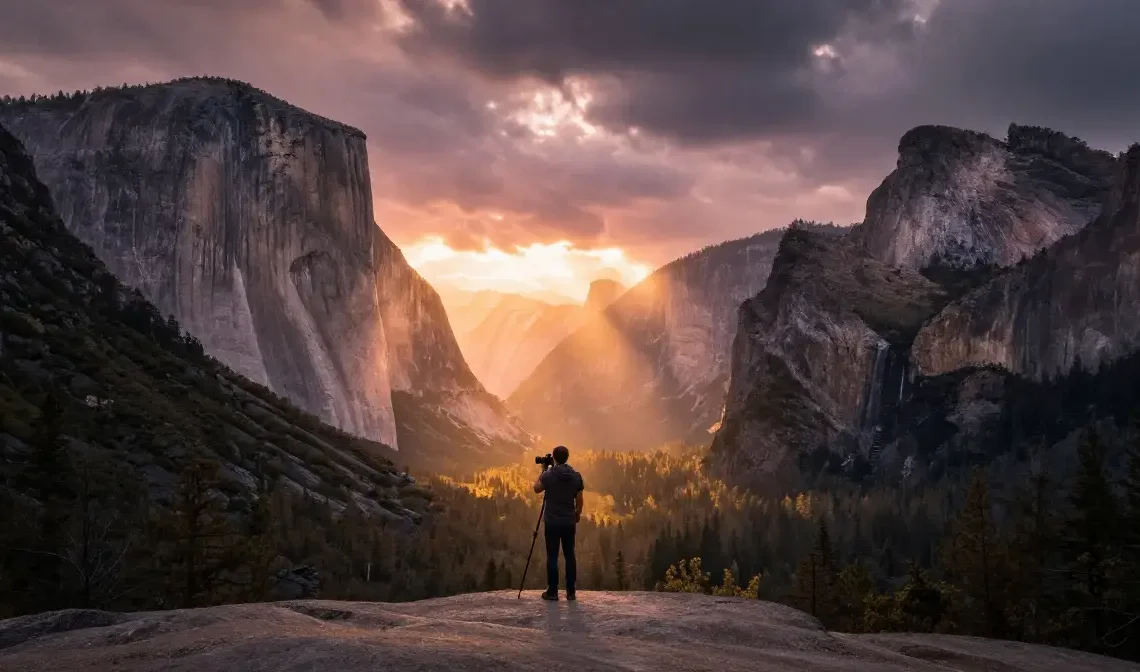
Every photographer has stood before a breathtaking view and felt that familiar frustration — the scene is magnificent but the photo looks flat, lifeless and completely ordinary. Your eyes see depth, atmosphere and emotion. Your camera sees pixels. Bridging that gap is exactly what scenic photography mastery is about. American landscapes offer some of the most extraordinary visual opportunities on the planet — from the granite walls of Yosemite to the painted desert of Arizona — yet most photographers return home with images that don’t do justice to what they witnessed. This guide changes that completely.
Why Most Landscape Photographers Never Capture What Their Eyes Actually Saw
Your eyes are not a camera. They adjust constantly — brightening shadows, softening highlights, sharpening edges — all in real time without you noticing. A DSLR camera or mirrorless camera captures a single frozen moment with a fixed exposure and that’s where most photographers first stumble. Visual storytelling through landscapes requires understanding this fundamental difference before anything else.
The solution isn’t better gear. It’s better vision. Outdoor visual composition training teaches you to pre-visualize — to see the scene not as your eyes present it but as your sensor will record it. Scenic photography composition begins in your mind before you raise the camera. Photographers who understand this produce consistently stronger images regardless of what equipment they carry.
The Golden Hour Window That Separates Amateur Shots From Professional Results
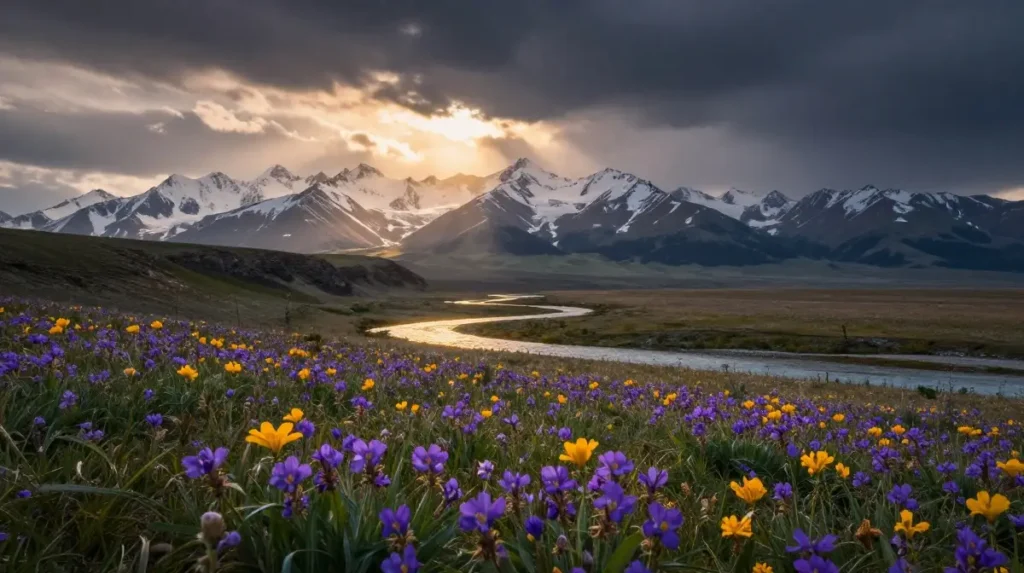
Golden hour photography isn’t a myth or a cliché — it’s physics. When the sun sits low near the horizon the light travels through significantly more atmosphere and that journey strips away harsh blue wavelengths leaving only warm gold and amber tones that wrap around subjects like a natural softbox. How to shoot golden hour landscapes effectively means being set up and ready at least 30 minutes before the sun actually touches the horizon.
The window is brutally short. On average you get 20 to 40 minutes of truly usable golden light and the quality shifts every single minute within that window. Scenic photography lighting techniques built around golden hour require scouting your location the day before so you aren’t fumbling with settings when the light peaks. Professionals don’t arrive at golden hour — they arrive at blue hour and wait.
| Light Period | Duration | Color Tone | Best For |
|---|---|---|---|
| Blue Hour | 20–30 min before sunrise | Cool blue, indigo | Long exposure, cityscapes |
| Golden Hour | 20–40 min after sunrise | Warm gold, amber | Portraits, landscapes |
| Midday | Several hours | Harsh white | Avoid for most landscapes |
| Evening Golden | 20–40 min before sunset | Deep orange, rose | Dramatic landscapes |
| Evening Blue | 20–30 min after sunset | Soft purple, navy | Minimalist scenes |
Scenic Photography Camera Settings That Unlock Stunning Results Every Single Time
Scenic photography camera settings aren’t a universal formula but a starting framework matters enormously. Set your aperture between f/8 and f/11 for landscapes — this range delivers maximum sharpness across the entire frame on most lenses. Keep your ISO settings at the base value your camera allows, typically ISO 100, to minimize digital noise in those large expanses of sky and water.
Best settings for scenic photography also depend on your creative intent. Want silky waterfalls? Drop your shutter speed to half a second or slower using an ND filter to control exposure. Want frozen crashing waves? Push shutter speed above 1/500th. How to shoot scenic photos outdoors with consistent results means understanding your camera’s exposure triangle deeply enough to adjust intuitively when conditions shift suddenly.
How Foreground Interest Transforms a Flat Landscape Into a Compelling Visual Story
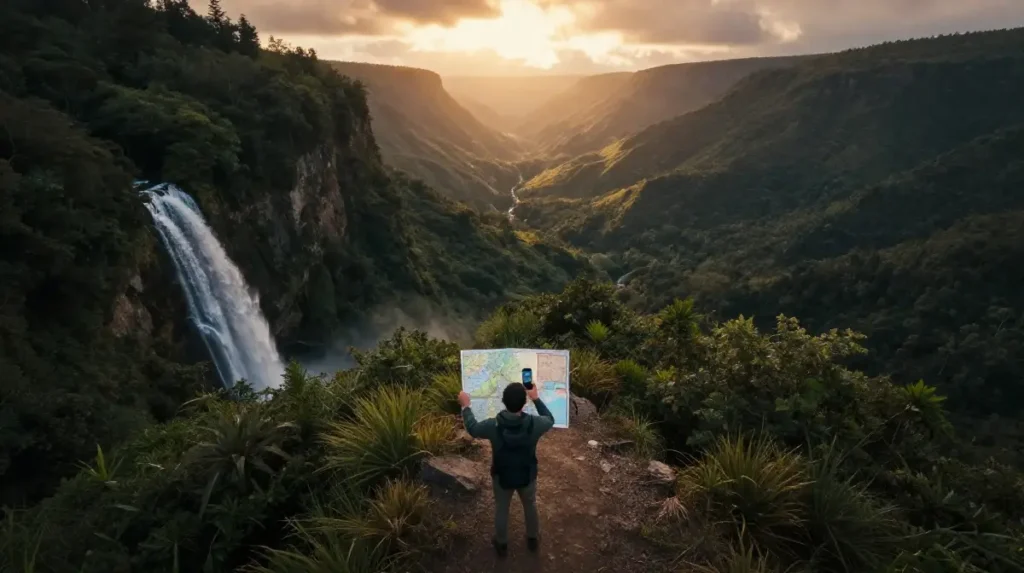
Foreground interest in landscapes is the single most underused technique in outdoor photography. A compelling foreground anchors the viewer’s eye and creates an immediate sense of depth that drags them into the image. Without it even a stunning vista feels like wallpaper — pleasant but emotionally distant and forgettable within seconds.
Consider what’s at your feet. Rocky shorelines, wildflower patches, frost-covered grass, tidal pools, fallen leaves — any of these placed thoughtfully in the near field of your composition creates a visual journey from front to back. Nature inspired photography techniques that leverage foreground elements work because the human eye naturally reads a photograph from bottom to top and foreground interest gives that journey a meaningful starting point.
The Rule of Thirds Is Outdated — Here Is What Top Photographers Use Instead

The rule of thirds isn’t wrong — it’s just incomplete. Placing your horizon on the lower third works reliably but it doesn’t explain why some compositions feel electric while others feel merely correct. Framing techniques scenic shots at the highest level use dynamic symmetry, the phi grid and natural visual weight to create compositions that feel genuinely inevitable rather than formulaic.
Scenic photo composition techniques used by working professionals also borrow heavily from classical painting — specifically the concept of visual tension. Placing your subject slightly off the phi spiral’s natural resting point creates a subtle restlessness that keeps the viewer’s eye moving through the frame. How to compose a scenic photograph with real sophistication means studying painters like Turner and Ansel Adams not just photography tutorials on social media.
Wide Angle vs Telephoto — Which Lens Actually Wins for Scenic Photography
The wide angle lens dominates landscape photography for one simple reason — it exaggerates depth. It pushes the background further away while pulling the foreground dramatically closer creating that immersive three-dimensional quality that makes viewers feel present inside the scene. Wide angle scenic photography tips always emphasize getting close to foreground elements to maximize this stretching effect.
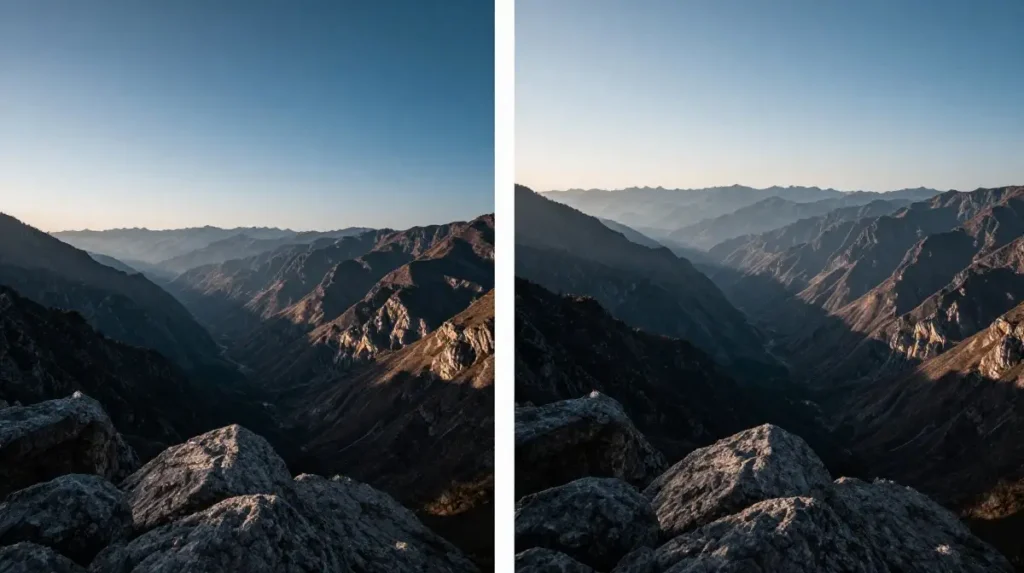
However the focal length question isn’t settled by wide angle alone. A telephoto lens compresses distance and stacks layers of a scene in a way that wide angles physically cannot achieve. How to capture scenic mountain views with atmospheric haze and compressed ridgelines requires a telephoto of 200mm or longer. Smart photographers carry both and choose based on the specific story each scene demands.
How ND Filters Change Everything You Thought You Knew About Outdoor Exposure
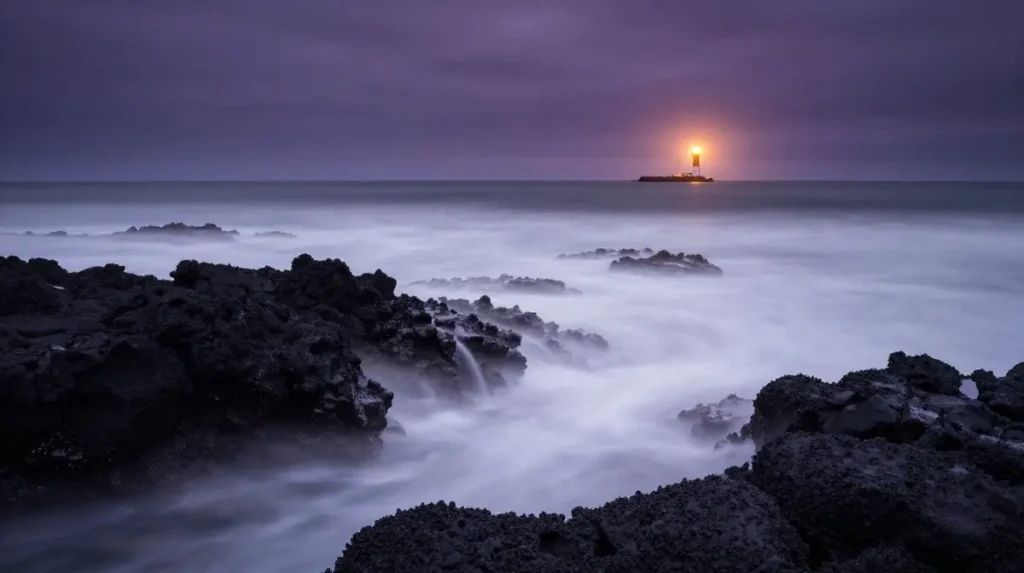
An ND filter is essentially sunglasses for your lens. It reduces the amount of light entering the camera without affecting color and that single capability opens creative doors that no other accessory can match. Long exposure scenic photography in broad daylight becomes possible only because ND filters allow shutter speeds of 30 seconds, 2 minutes or even longer while maintaining correct exposure.
you may also like this:22 Roman Colosseum Ideas for Historic Travel Inspiration
Capturing movement in landscapes — smoothing rivers into silk, turning breaking waves into mist, transforming crowded tourist spots into empty serene scenes — all depends on extended shutter speeds that the ND filter enables. A 10-stop ND filter is the most versatile starting point for landscape photographers. Combined with a solid tripod it unlocks a category of imagery that most beginners don’t even know exists.
The Blue Hour Secret That Most Photography Tutorials Completely Ignore
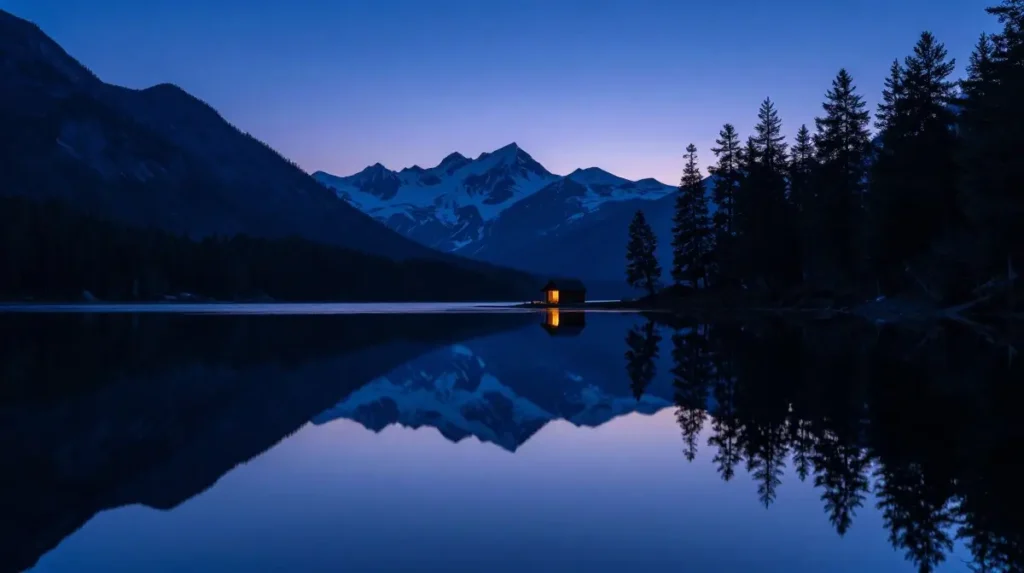
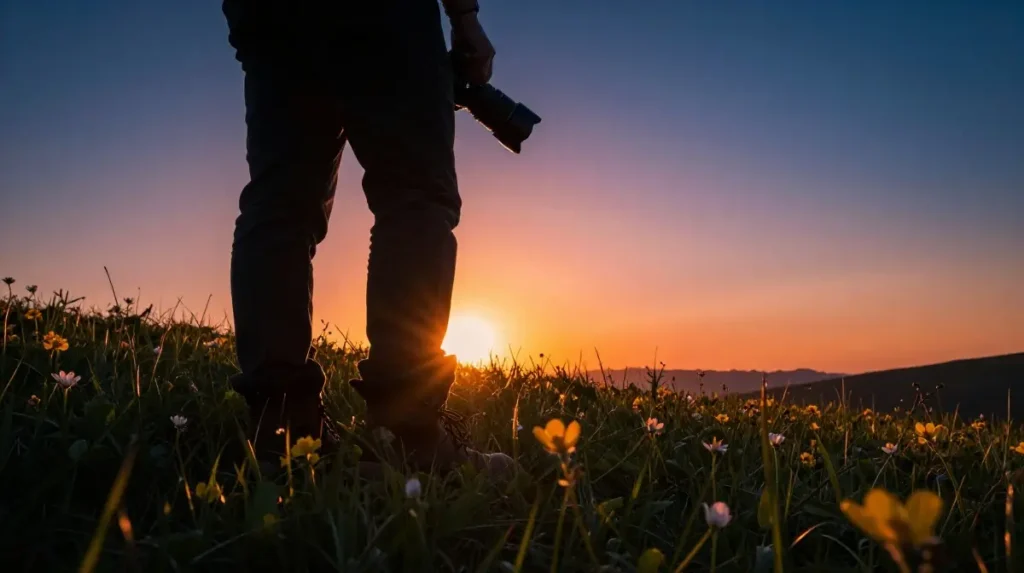
Scenic photography during blue hour produces images with a quality of light that golden hour simply cannot replicate. After sunset the sky becomes a massive even softbox emitting a cool blue-purple luminosity that wraps around landscapes with zero harsh shadows. Natural light landscape photography during blue hour has a painterly atmospheric quality that feels almost otherworldly in the final image.
Most photographers pack up at sunset and drive home missing this entirely. The 20 minutes following sunset — before darkness fully arrives — deliver some of the most emotionally resonant light available to any outdoor photographer. Photography in natural environments during blue hour also benefits from the fact that ambient light and any artificial light sources achieve a natural balance creating scenes with extraordinary tonal range and mood.
How to Read Weather Like a Photographer and Turn Bad Conditions Into Great Shots
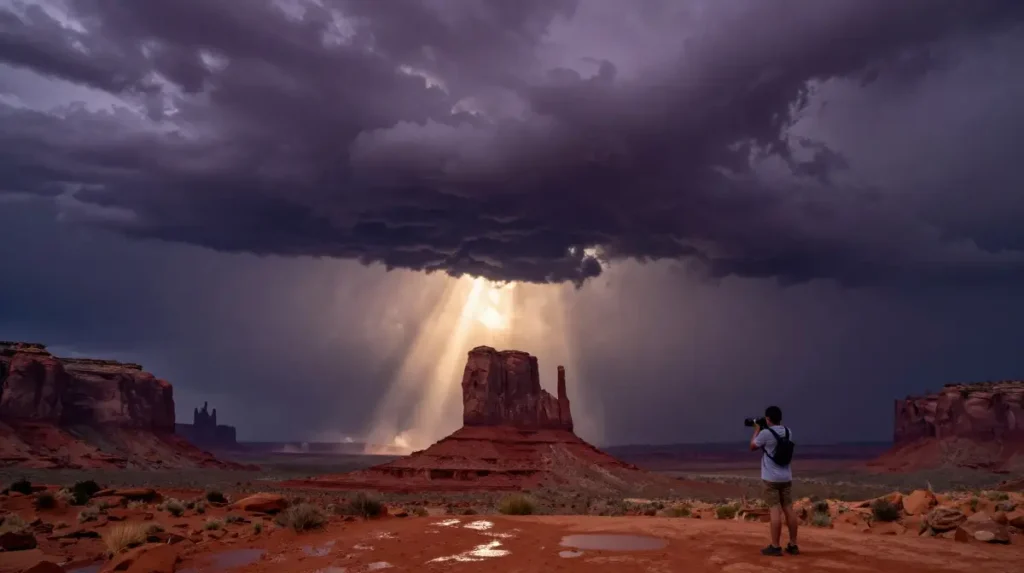
Overcast skies aren’t bad weather for photographers — they’re a giant diffusion panel provided free of charge. Scenic photography weather conditions that most people avoid — stormy skies, incoming fog, post-rain light, dramatic cloud formations — consistently produce the most memorable and emotionally powerful landscape images. Clear blue sky midday light is the condition you should actually avoid.
Dramatic outdoor photo scenes almost always feature extreme weather elements. Storm light — the brief window when the sun breaks through just before or after a storm — produces a contrast between dark threatening sky and brilliantly lit landscape that no studio lighting setup can artificially recreate. Download a weather radar app and learn to position yourself at the edge of passing storm systems. That’s where the extraordinary images live.
RAW vs JPEG for Landscapes — The Answer Might Surprise Serious Shooters
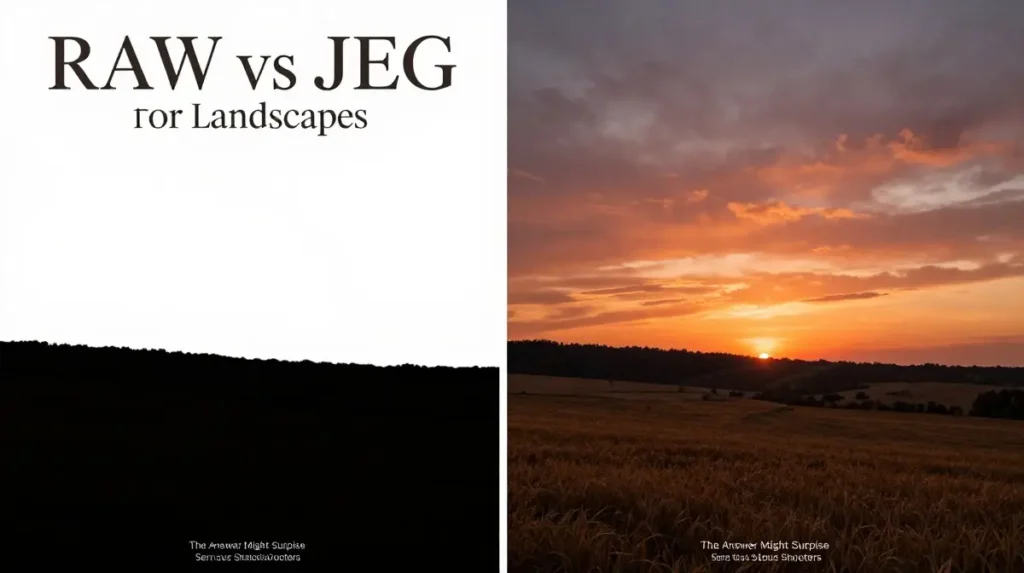
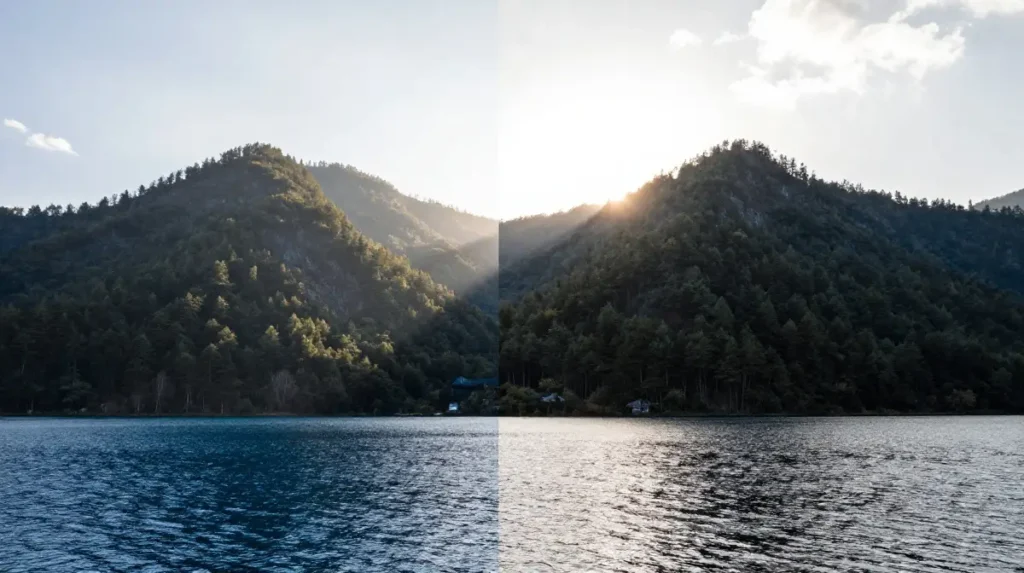
RAW format files aren’t photographs — they’re raw sensor data waiting to be interpreted. A RAW file contains roughly four times more tonal information than a JPEG and that additional data becomes critical when you’re recovering a blown highlight in a sunset sky or lifting shadow detail in a dark forest floor. Scenic photography post processing built on RAW files delivers results that JPEG simply cannot match.
The practical difference becomes visible in extreme conditions. Photograph a high-contrast scene in JPEG and blown highlights stay blown permanently. Shoot the same scene in RAW format and Adobe Lightroom can recover two to four stops of highlight detail that appears completely lost on the back screen. How to edit scenic landscape photos at a professional level starts with this single decision at the moment of capture.
How Leading Lines Pull a Viewer Straight Into the Heart of Your Landscape
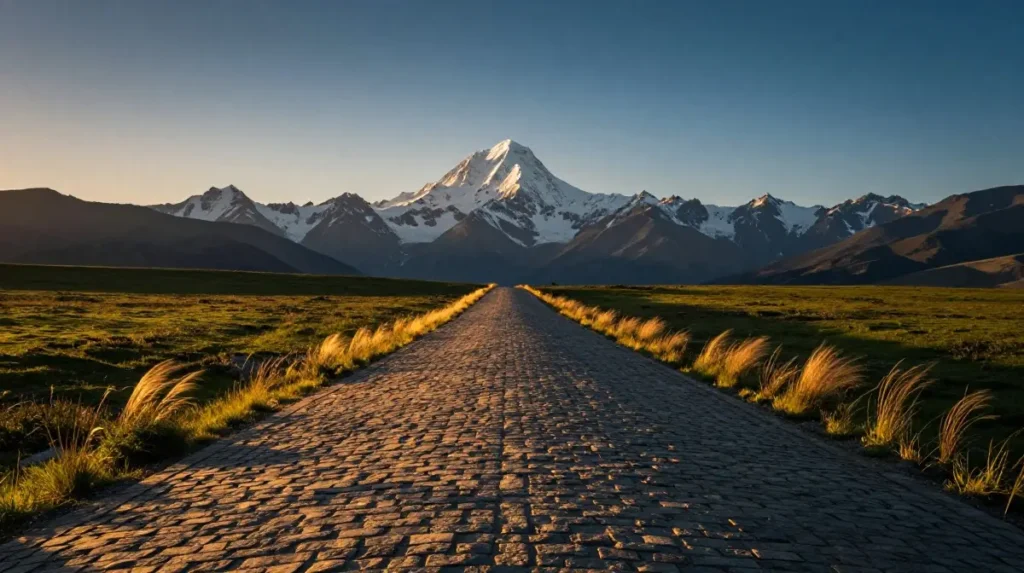
Leading lines in landscape photos function like invisible hands guiding your viewer’s gaze from the edge of the frame toward your main subject. Roads, rivers, fences, shorelines, mountain ridges, shadows — any linear element angled toward your focal point serves this purpose. Scenic photo composition techniques built around strong leading lines create images with a forward momentum that feels almost cinematic.
The most powerful leading lines converge. Two lines meeting at a distant point — like railroad tracks or a country road vanishing toward mountains — create perspective and depth simultaneously. Countryside visual documentation photographed with converging lines communicates scale in a way that flat compositions never achieve. Find your lines before you find your subject and your compositions improve immediately and dramatically.
The Tripod Mistake That Is Quietly Ruining Your Long Exposure Landscape Photos
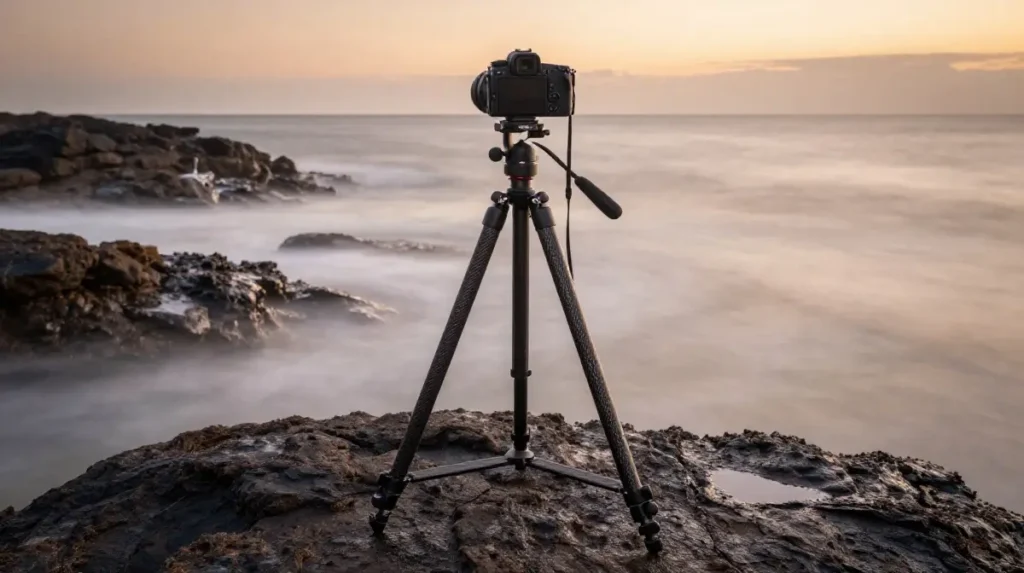
The tripod mistake isn’t using the wrong model — it’s using the right model incorrectly. The most common error is extending the center column to gain height. That column acts as a lever and at full extension even minor wind creates micro-vibrations that destroy sharpness in long exposures. Keep the center column retracted always and use the leg sections for height adjustment instead.
Long exposure scenic photography demands vibration elimination at every possible point. Use your camera’s two-second self-timer or a remote shutter release to eliminate hand vibration at the moment of capture. Enable mirror lockup on a DSLR camera to eliminate the vibration caused by the mirror flipping up. These habits combined make the difference between a sharp 30-second exposure and a disappointingly soft one.
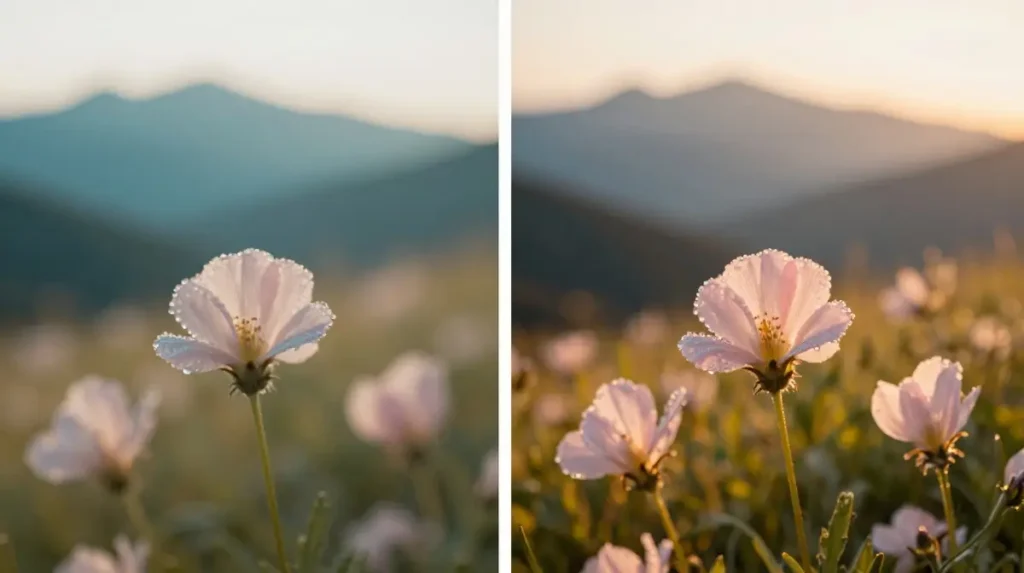
Color Grading Techniques That Make Scenic Images Feel Cinematic and Alive
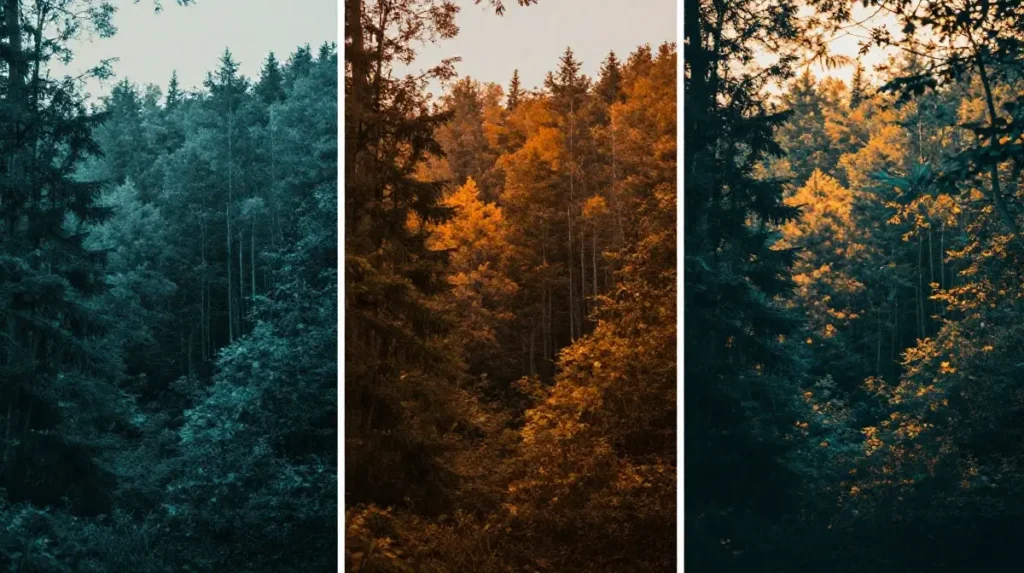
Color grading scenic images separates technically correct photographs from emotionally compelling ones. The human eye associates certain color relationships with specific emotional states — teal and orange evoke cinematic drama, warm golden tones evoke nostalgia, cool blue-green palettes evoke tranquility. Understanding these associations lets you guide how viewers feel when they look at your landscape images.
Adobe Lightroom’s HSL panel is where color grading begins in earnest. Shift the hue of greens slightly toward teal for a moodier forest. Push the luminance of blues downward to deepen a sky without darkening the landscape. Scenic photography post processing using split toning — adding warm tones to highlights and cool tones to shadows — creates that cinematic separation that makes images look professionally finished rather than simply edited.
How Reflections in Water Double the Drama in Any Outdoor Photography Scene
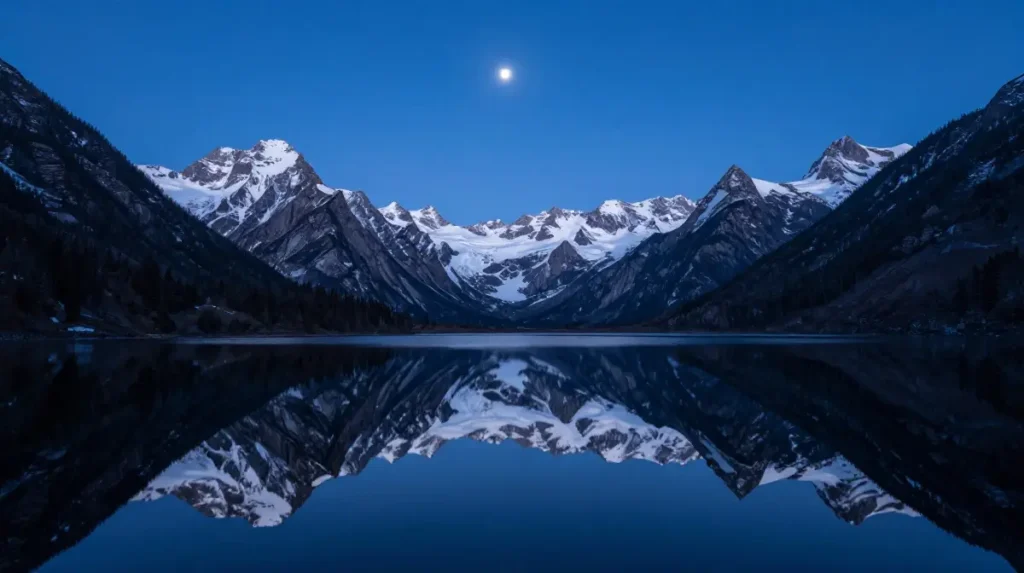
Reflections in landscape photography are essentially free symmetry — a complete mirror image of your scene that adds visual complexity without adding compositional clutter. Still water after rainfall, calm lakes at dawn before wind arrives, tide pools on a flat beach, frost on glass — every reflective surface offers a compositional opportunity that doubles the visual information in your frame.
Stunning horizon photography featuring reflections works best when you shoot from very low to the ground. Get your lens as close to the water surface as safely possible. This angle maximizes the visible reflection area and creates that glassy sweeping foreground that pulls viewers immediately into the scene. Serene nature photo compositions using water reflections also benefit from shooting in the calm morning hours before wind disturbs the surface.
The Histogram Habit That Every Landscape Photographer Needs to Build Immediately
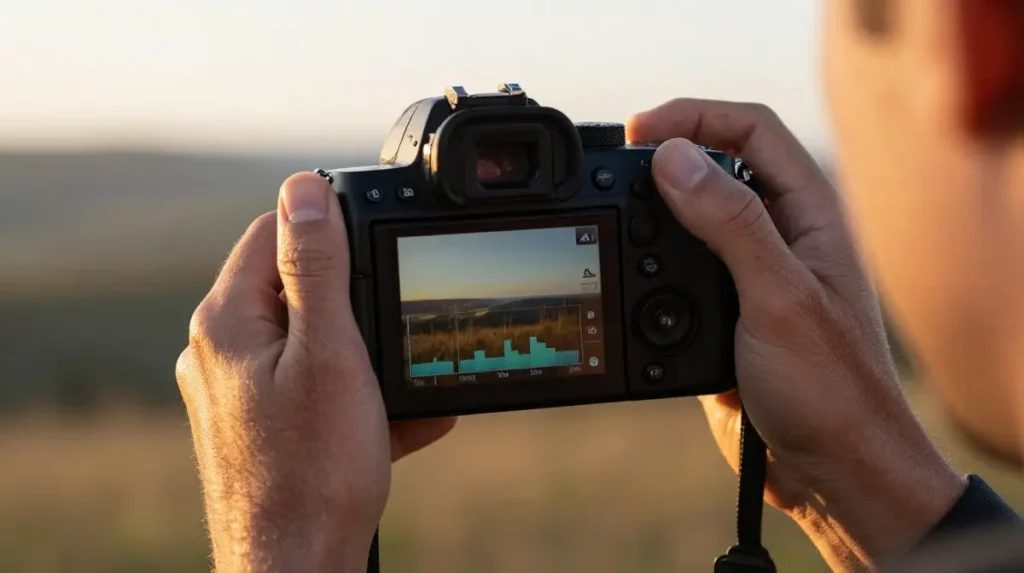
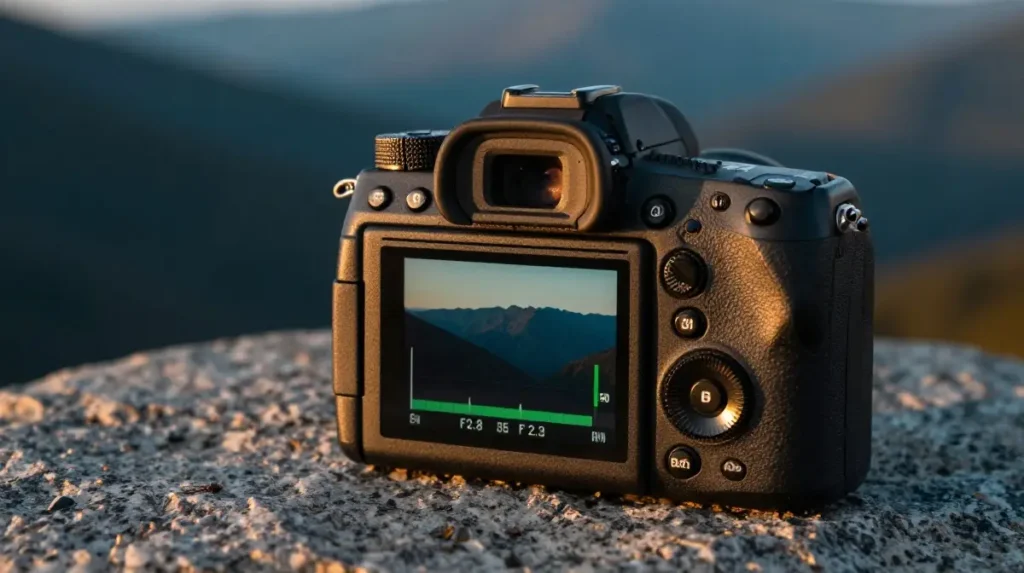
The histogram doesn’t lie. Your camera’s LCD screen does — brightness, ambient light and viewing angle all make the screen an unreliable judge of exposure quality. A histogram shows you the actual distribution of tones across your image from pure black on the left to pure white on the right and reading it correctly eliminates consistently over or underexposed landscape images.
For landscape photography the ideal histogram shows a broad mountain-shaped distribution sitting comfortably within the boundaries without touching either edge. Touching the right edge means blown highlights — lost detail you cannot recover even in RAW format. Best settings for scenic photography in high-contrast conditions often require exposure bracketing — shooting three frames at different exposures and blending them in Adobe Lightroom or Photoshop to retain detail across the full tonal range.
Smartphone Scenic Photography Tips That Actually Compete With DSLR Results
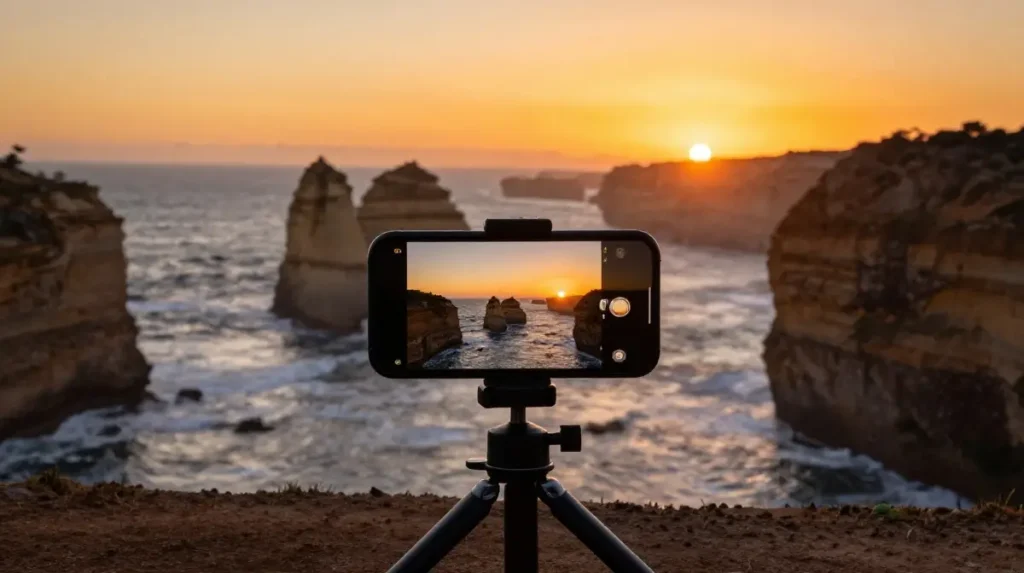
Modern smartphone cameras are genuinely remarkable. The computational photography built into current flagship phones produces landscape images that would have required professional equipment just five years ago. Scenic photography with smartphone success depends on understanding what your phone does well — computational HDR, multi-frame noise reduction and AI sky enhancement — and using those strengths deliberately.
How to take scenic photos with a smartphone that compete with DSLR output requires three habits. Shoot in RAW or ProRAW mode if your phone supports it. Use a small tripod for any low-light or long-exposure work. And avoid the digital zoom completely — move your feet instead. Tips for capturing scenic landscapes with mobile devices also include shooting in portrait orientation for dramatic vertical compositions that perform exceptionally well on social platforms.
How Seasonal Changes Create Four Completely Different Photography Opportunities
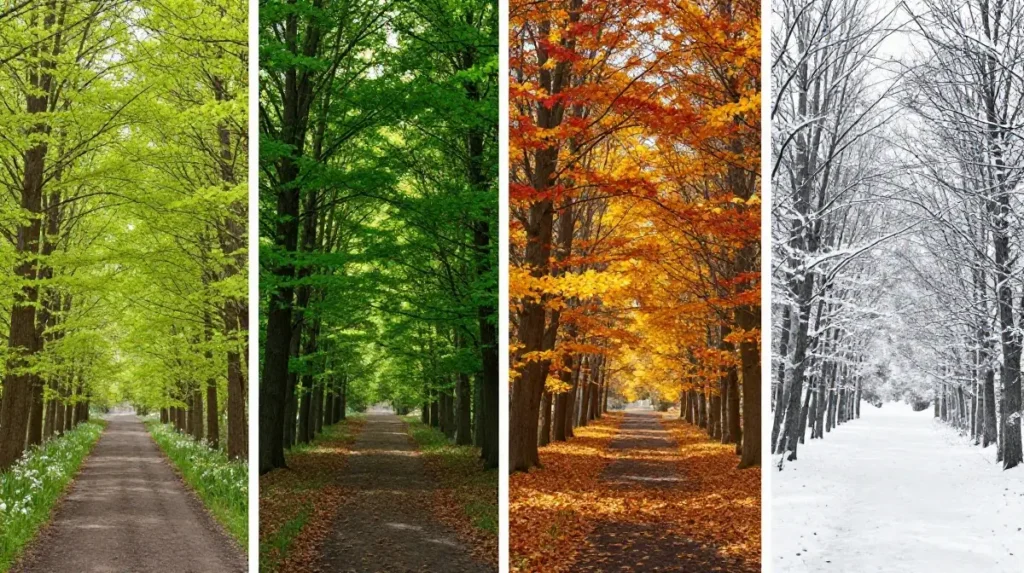
Photography of seasonal landscapes gives you four entirely different visual palettes from the same location. Spring delivers soft greens, wildflower explosions and dramatic storm light. Summer brings deep saturated greens and long golden hours. Autumn produces the most photographically rich palette available — amber, crimson, burnt orange and gold against blue sky. Winter strips everything back to graphic minimalism and extraordinary blue hour clarity.
Landscape photography veterans revisit the same locations across all four seasons because familiarity with a location allows you to focus entirely on light and composition rather than orientation. How to find scenic photography locations worth revisiting seasonally involves using tools like Google Earth, PhotoPills and AllTrails to identify locations with strong compositional potential across multiple seasons rather than simply chasing dramatic one-time events.
Depth of Field Decisions That Make or Break a Scenic Landscape Composition
Depth of field scenic shots require a decision that most beginners never consciously make — how much of the scene should appear sharp? For classic sweeping landscapes everything from the nearest rock to the farthest mountain should be razor sharp. For intimate moody scenes a shallow depth created by a wider aperture can isolate a single element and communicate focus and intentionality powerfully.
The hyperfocal distance concept governs landscape sharpness and every serious outdoor photographer should understand it. At any given aperture and focal length there exists a specific focus distance beyond which everything from half that distance to infinity appears acceptably sharp. Focusing at hyperfocal distance maximizes sharpness across the entire landscape frame. Depth of field scenic shots built on this principle consistently outperform images focused at infinity or at an arbitrary middle distance.
Adobe Lightroom Editing Workflow Built Specifically for Landscape and Scenic Shots
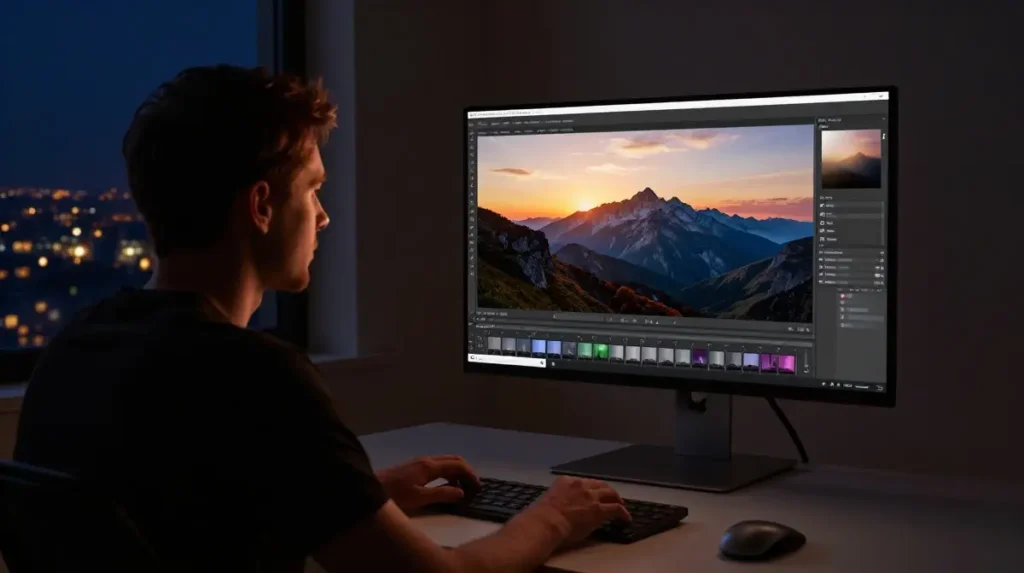
Adobe Lightroom editing for landscapes follows a sequence that professional photographers have refined over years of practice. Start with lens correction to eliminate distortion introduced by your wide angle lens. Set white balance next using the eyedropper on a neutral tone. Then address overall exposure before moving to highlights, shadows, whites and blacks in that specific order.
How to edit scenic landscape photos with maximum efficiency in Adobe Lightroom means using presets as starting points rather than finished looks. Apply a base preset then use the HSL panel to fine-tune individual colors. The graduated filter tool handles sky-to-land exposure transitions that single global adjustments cannot resolve. Scenic photography post processing executed this way produces images that look natural and emotionally compelling rather than obviously over-processed.
How Polarizing Filters Eliminate Glare and Unlock Colors Hidden in Plain Sight
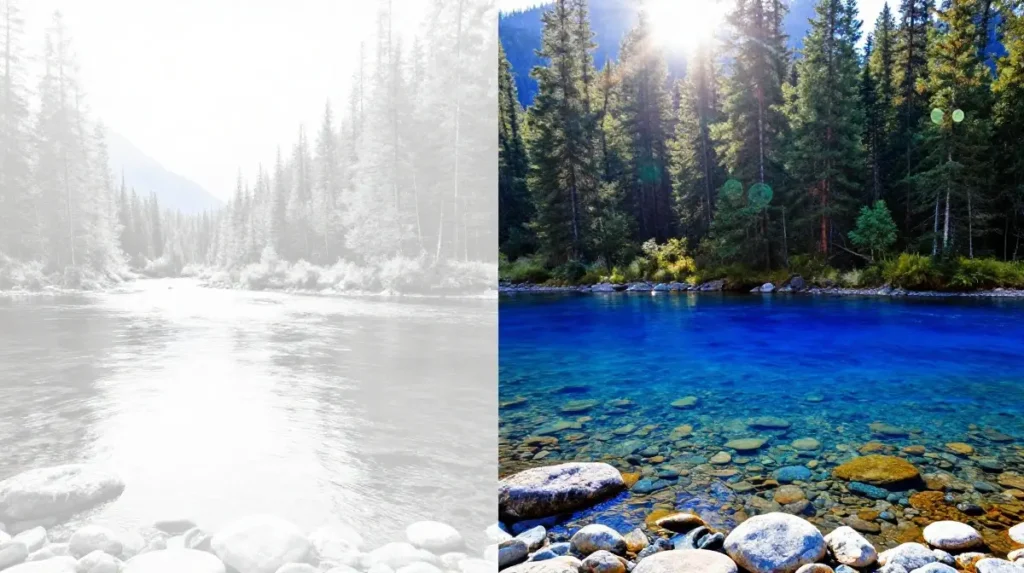
A polarizing filter does something no post-processing software can replicate — it physically eliminates reflected light at the point of capture. Rotate it to the correct angle and a pale washed-out sky suddenly becomes a deep saturated blue. A glare-covered river surface turns transparent revealing the riverbed below. High contrast scenic photography benefits enormously from polarization because it reduces the tonal gap between bright sky and dark landscape naturally.
The effect is strongest when you shoot at 90 degrees to the sun’s position. Point your camera north or south during a sunrise or sunset and the polarizer performs at maximum efficiency. Photography of open natural spaces with water or wet surfaces gains the most dramatic transformation from a quality polarizing filter. Invest in a multicoated version — cheaper polarizers introduce color casts that defeat the purpose entirely.
Finding Locations Nobody Has Photographed Yet — The Research Method That Works
How to find scenic photography locations that haven’t been exhausted by thousands of Instagram photographers requires moving beyond the obvious resources. Google Maps satellite view reveals compositional potential invisible from road level — search for rivers meeting lakes, clearings on hillsides with unobstructed sight lines, coastal rock formations at specific tidal conditions. Scenic photography locations discovered this way give you a genuine competitive advantage.
Travel photography research also benefits from studying historical topographic maps which show elevation changes, water features and terrain structures that modern satellite imagery sometimes obscures. Cross-reference your discovered locations with PhotoPills to understand exactly when the sun or moon will align with specific landscape features. Wilderness photography planned this way — combining topographic research with astronomical alignment data — produces images with a specificity and intentionality that casual exploration simply cannot achieve.
The Mental Approach That Turns Scenic Photography Into a Meditative Creative Practice
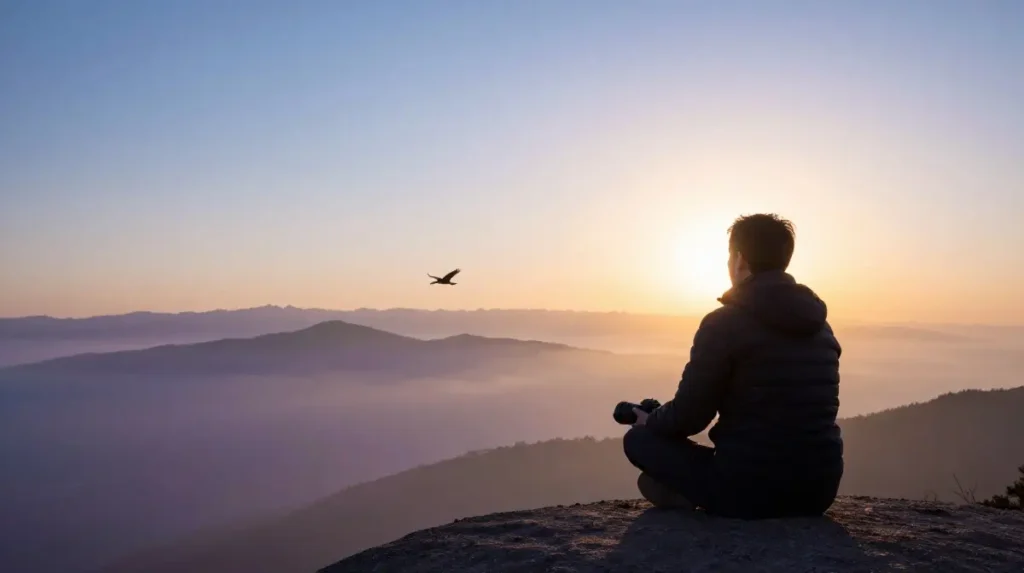
Peaceful outdoor photo moments don’t happen accidentally. They require a deliberate slowing of pace that runs completely counter to modern life’s default speed. The photographers who consistently produce the most emotionally resonant landscape work share one visible habit — they arrive early, move slowly and spend significant time simply observing before they raise the camera to their eye.
Scenic photography at its deepest level is an act of attention. It trains you to notice the quality of light on a grass blade, the way mist moves through a valley or the precise moment clouds part to reveal a mountain peak. Immersive landscape imagery created with this meditative attentiveness carries an emotional quality that technically perfect but emotionally absent images will never possess. The camera records what you notice and what you notice depends entirely on how carefully you’re paying attention.
Frequently Asked Questions
What is the best camera setting for scenic photography?
Start with aperture f/8 to f/11 for maximum sharpness across the frame. Set ISO settings to your camera’s base value — typically ISO 100. Let shutter speed adjust based on your creative intent and use a tripod for any exposure longer than 1/60th of a second. Shoot in RAW format always for maximum editing flexibility in Adobe Lightroom afterward.
What time of day is best for landscape and scenic photography?
Golden hour photography — the 20 to 40 minutes after sunrise and before sunset — delivers the warmest most directional light available. Scenic photography during blue hour immediately before sunrise and after sunset produces cooler atmospheric light with extraordinary mood. Midday harsh direct light is the least favorable condition for most landscape photography unless you’re specifically working with intentional high-contrast effects.
Do I need a tripod for scenic photography?
A tripod is essential for any serious landscape work. It enables long exposure scenic photography, eliminates camera shake in low light conditions, allows precise composition adjustment and forces a slower more deliberate shooting pace that improves image quality beyond the technical benefits. Invest in a quality carbon fiber model — it’s one of the highest-impact purchases any landscape photographer can make.
What is the best lens for scenic and landscape photography?
A wide angle lens between 16mm and 24mm handles the majority of classic landscape compositions effectively. A mid-range zoom like 24-70mm covers versatile everyday scenic work. A telephoto of 70-200mm enables how to capture scenic mountain views with compressed atmospheric perspective. Most working landscape photographers carry all three focal length ranges and select based on each scene’s specific compositional requirements.
How do I make my scenic photos look more professional?
Master exposure using your histogram rather than your LCD screen. Shoot in RAW format and edit in Adobe Lightroom using a deliberate tonal workflow. Study foreground interest in landscapes and leading lines in landscape photos to build compositions with genuine depth. Shoot during golden hour and blue hour exclusively until your eye for quality light becomes instinctive. Technical precision combined with compositional intentionality is what separates professional results from amateur ones.
Conclusion
Scenic photography rewards the patient, the prepared and the genuinely curious. Every element covered here — from golden hour timing to foreground interest in landscapes, from RAW format capture to color grading scenic images in post — builds toward a single outcome: photographs that make viewers feel something real. The landscape doesn’t change. Your ability to read, interpret and translate it does. Invest in that ability consistently and the images will follow with a reliability that no amount of expensive gear can substitute for. Go slowly. Arrive early. Stay past sunset. The extraordinary light is always there for the photographers willing to wait for it.