
Every trail tells a story, but most people walk away with photos that don’t tell it well. The light was beautiful. The view was extraordinary. And the photo looks flat, awkward, or like nobody really enjoyed themselves at all. Hiking poses photo ideas exist to solve that exact gap — not by manufacturing fake moments, but by understanding light, body positioning, composition, and timing well enough that the photos finally match the experience. This guide walks through every dimension of trail photography: from golden hour science to summit silhouettes, from solo shooting workflows to group photo dynamics, from gear-as-composition to honest editing approaches that keep your hiking photos looking like memories rather than advertisements. Whatever trail you’re on next, these ideas will change what comes home in your camera roll.
The Trail Light Window That Makes Every Hiking Photo Feel Cinematic
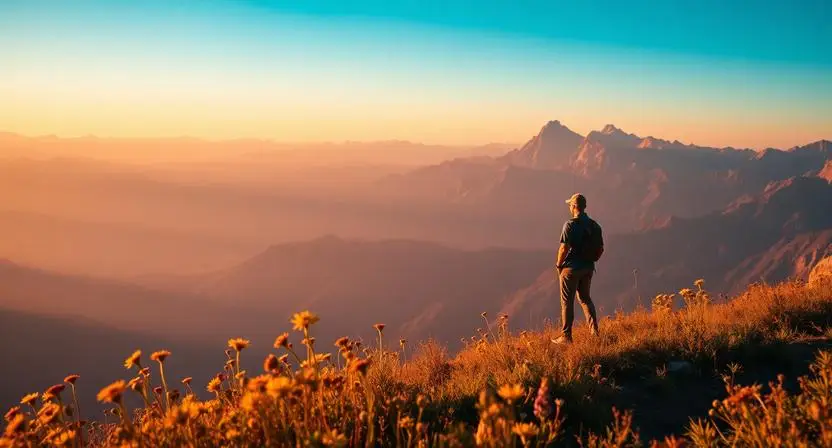
Light decides almost everything in outdoor photography, and most hikers never plan around it. Golden hour hiking photography — the hour after sunrise and the hour before sunset — produces warm, low-angle light that wraps around the body, creates long dramatic shadows, and turns ordinary trail scenery into something genuinely cinematic. Midday sun, by contrast, flattens faces and blows out skies.
Trail photo natural lighting during golden hour also interacts beautifully with dust, mist, and foliage — creating the soft glow that defines so much of the best outdoor adventure photography ideas you see online. Backlit hiking photography during this window produces glowing hair edges and rim-lit silhouettes that midday light simply can’t replicate. If your hike’s timing allows even one golden hour window — sunrise on the ascent or sunset on the descent — plan your most important shots around it. The same trail, same outfit, same pose looks like a completely different photograph depending on when you press the shutter.
Hiking Poses Photo Ideas That Look Effortless Instead of Forced
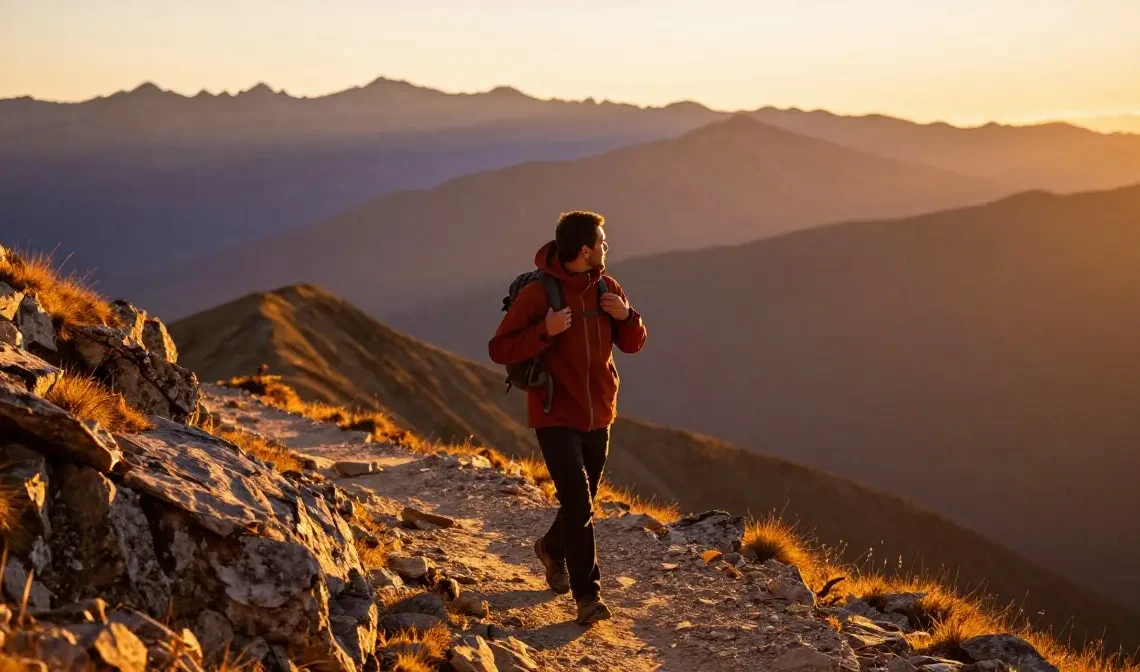
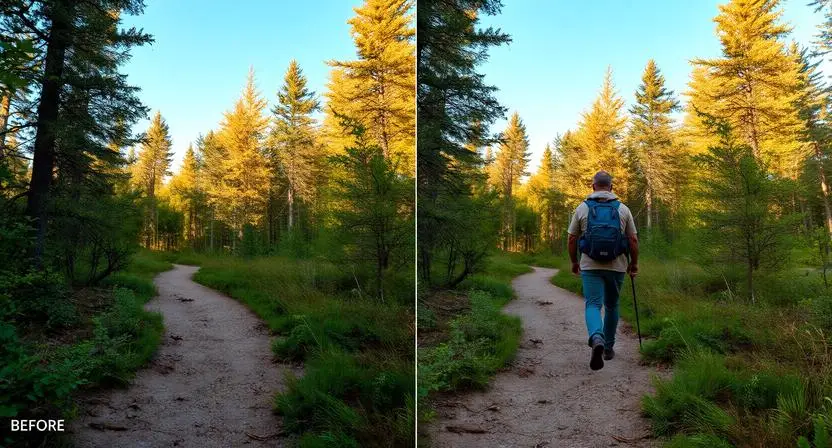
The biggest mistake in trail photography isn’t a bad location — it’s a stiff, locked posture that screams “I am posing for a photo right now.” Best poses for hiking photos avoid this by building in movement, asymmetry, and a sense of purpose. Instead of standing square to the camera with arms at your sides, try a three-quarter turn, one knee slightly bent, weight shifted onto your back foot like you’ve just paused mid-step.
How to pose for hiking pictures that look genuinely natural often comes down to giving yourself something to do. Adjust your backpack strap. Look at the view instead of the lens. Take a sip from your water bottle. Hiking pose body positioning that mimics real movement — walking, reaching, looking off-trail — reads as authentic in a way that a frozen smile never will. Cute hiking poses for pictures don’t need to be complicated; sometimes the simplest adjustment, like turning your head toward the landscape rather than the camera, transforms an entire image from stiff to storytelling.
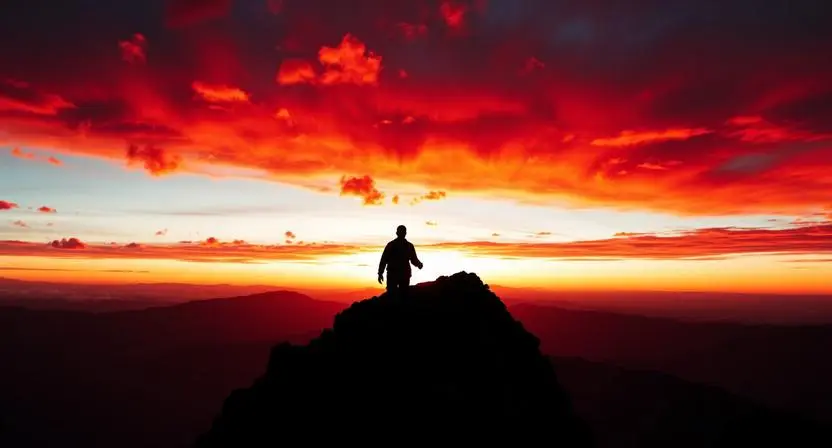
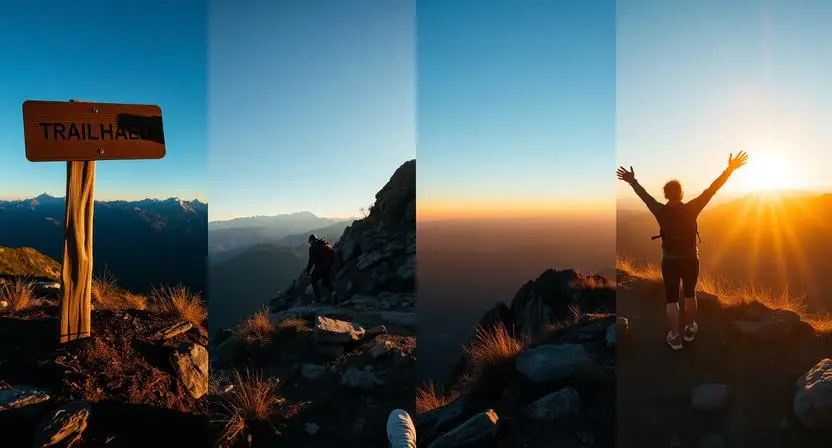
Summit Moments — Capturing the Feeling of Reaching the Top
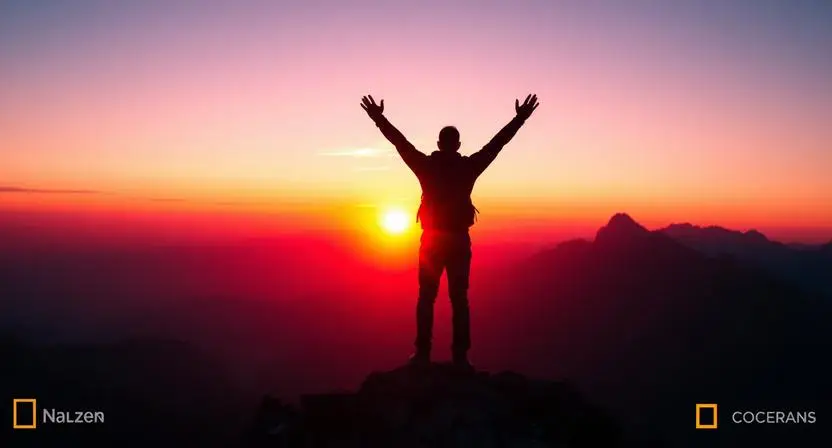
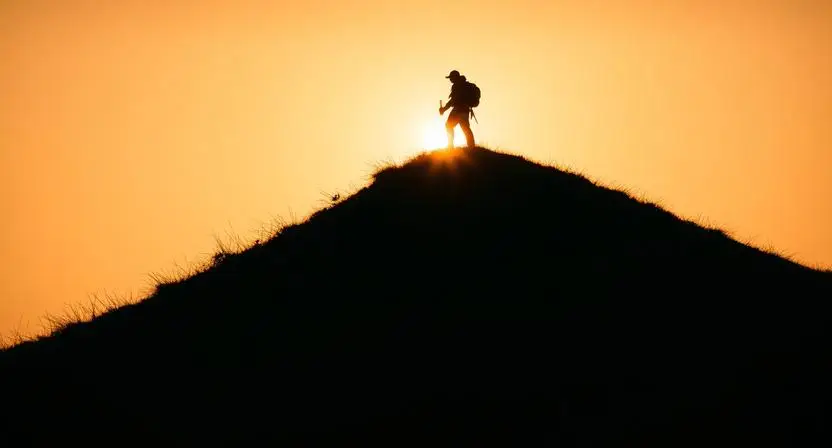
Reaching a summit is one of the most emotionally loaded moments of any hike, and summit photo ideas should reflect that weight rather than reduce it to a generic thumbs-up shot. How to pose on a mountain summit effectively often means capturing the moment of arrival itself — arms raised, looking out rather than at the camera, body still slightly winded from the climb. That authenticity reads instantly.
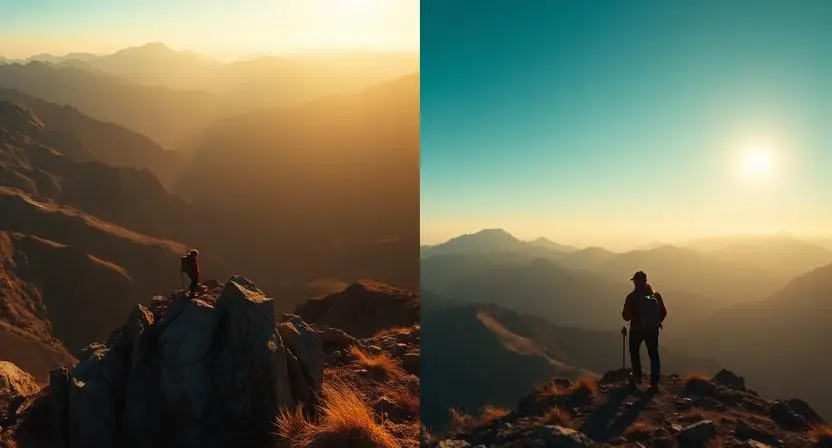
A summit silhouette photo idea works exceptionally well when the sun sits low behind the peak, turning the hiker into a dark, dramatic shape against a blazing sky. This technique requires almost no editing and produces some of the most striking hiking adventure pictures possible. Pair the silhouette with a wide framing that includes the full ridge line stretching away — the scale alone communicates the achievement without a single word of caption needed.
Backpack and Gear as Visual Elements That Add Depth to Every Shot
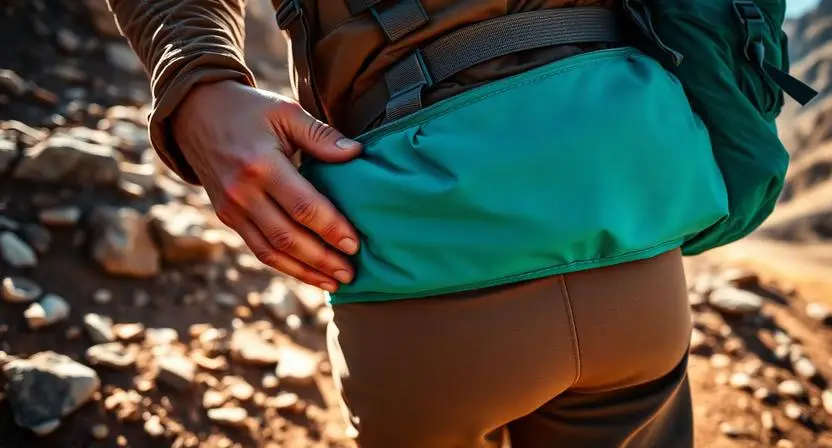
Your gear isn’t just functional — it’s a compositional tool. Hiking poses with a backpack create natural shape, color contrast, and storytelling detail that an empty-handed pose simply lacks. A brightly colored pack against a muted forest or rocky backdrop adds a focal point the eye is drawn to immediately, and the straps, buckles, and texture add visual interest even in a simple standing shot.
Brands like REI hiking photography, Patagonia hiking outfit, and The North Face hiking gear campaigns consistently use gear as a storytelling device rather than hiding it — trekking poles mid-stride, a pack being adjusted, a water bottle being pulled from a side pocket. Backpacking photo poses that incorporate this kind of gear interaction feel lived-in rather than staged. Even a simple shot of hands tightening a hip belt, shot from a low angle with the trail stretching behind, adds narrative depth that a plain portrait never achieves.
Solo Hiker Photography — Getting Stunning Shots Without a Second Person
Hiking alone doesn’t mean your photos have to suffer — it just means rethinking your workflow. How to take good hiking photos alone starts with a lightweight tripod or even a strategically placed rock, paired with your phone’s timer function or a small remote shutter. Solo hiking poses work best when you give yourself a clear action to repeat — walking toward the camera, adjusting a pole, looking at a map — so multiple takes capture natural variation.
Hiking pose ideas for solo travelers also benefit from using the landscape itself as your “co-star.” Frame yourself small within a vast scene — standing on a rock outcrop, walking along a ridge — and let the environment carry as much visual weight as you do. Hiking selfie poses taken with an extended arm or selfie stick work in a pinch, but a propped phone and a ten-second timer almost always produces a more compositionally interesting result, with you genuinely part of the landscape rather than dominating the frame.
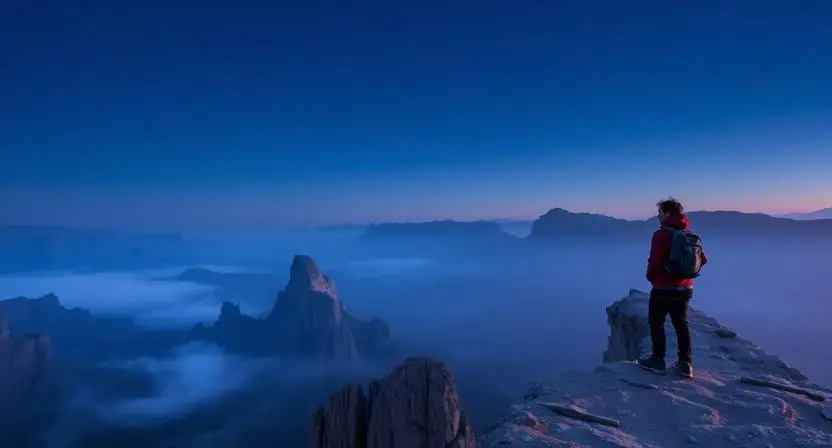
Silhouette Techniques That Transform a Simple Ridge Into Pure Drama
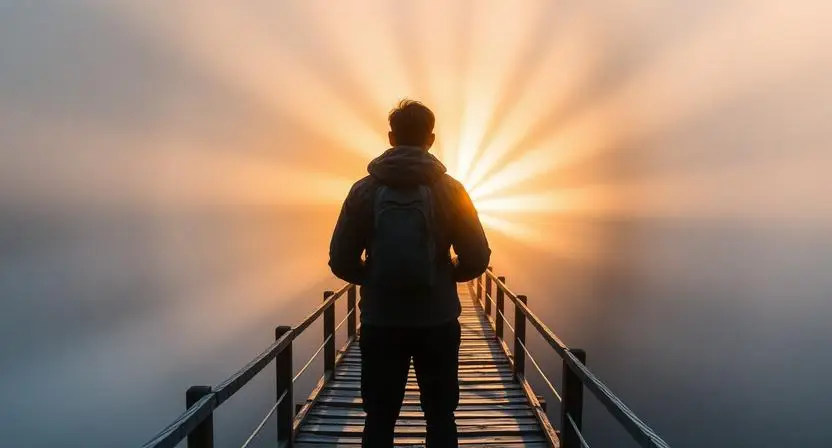
Few techniques deliver as much visual punch for as little effort as a well-executed silhouette. Silhouette hiking photo technique relies on positioning your subject between the camera and a bright light source — usually the sun near the horizon — so the figure renders as a pure dark shape against color and light. The technique strips away detail and replaces it with pure shape and gesture, which is often more powerful.
The key technical step is exposing for the sky, not the subject — let the person fall into shadow completely while the sky retains its color and brightness. Backlit hiking photography of this kind works beautifully on ridgelines, summit edges, and any spot where the horizon drops away behind the hiker. A figure mid-stride, arms swinging, against a blazing orange sky creates an image that feels almost mythic — and it requires zero special gear, just careful positioning and exposure.
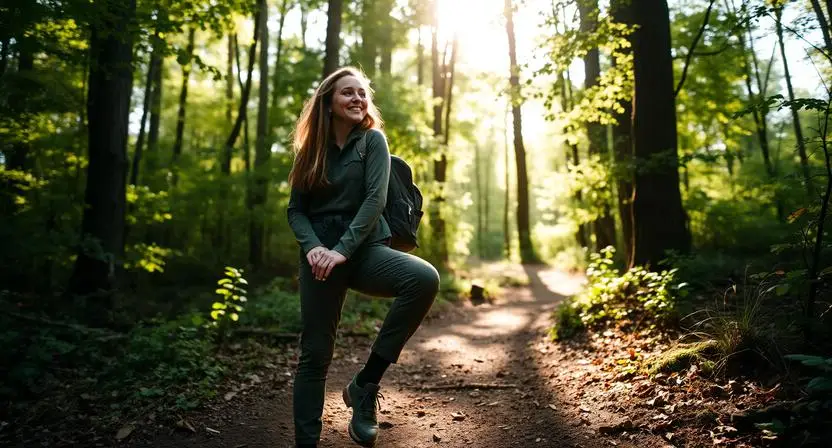
Forest Trail Photography — Working With Dappled Light and Deep Shadow
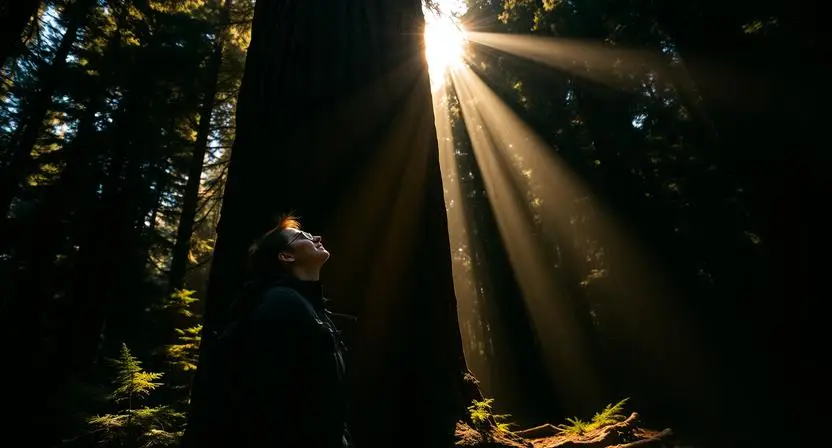
Forest trails present a completely different lighting puzzle than open ridgelines. Nature hike photography in wooded settings often means dealing with patchy, high-contrast light — bright sunbeams breaking through canopy gaps next to pools of deep shadow. Rather than fighting this, use it. Position your subject so a shaft of light falls across their face or shoulders while the background remains in shadow.
you may also like this:22 Modest Hiking Outfit Ideas for Comfortable Adventures
Forest hike poses that work with this environment include walking through a beam of light, looking up toward a canopy opening, or pausing beside a particularly textured tree trunk. Trail photography tips for forest settings also include shooting toward the light source when possible — even partially — to create atmospheric haze and depth between foreground and background layers. The deep green palette of a forest, combined with warm light pools, produces a nature trail photo aesthetic that’s instantly recognizable and consistently popular across Instagram hiking photos and Pinterest hiking photo ideas boards alike.
Couples on the Trail — Poses That Capture Connection Not Performance
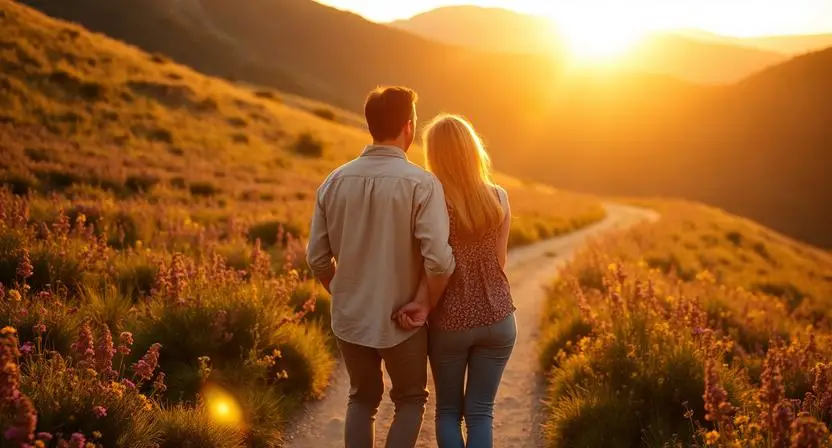
Hiking couple poses fail most often when both people stare directly at the camera with matching smiles — it reads as performance rather than connection. Hiking poses for couples photos that actually capture intimacy usually involve one person looking at the other, a shared laugh, or both people looking outward at the same view together rather than at the lens.
Walking hand-in-hand along a trail, shot from slightly behind or to the side, captures genuine rhythm and movement. Candid trail walking shot techniques work especially well for couples — ask them to simply continue their conversation and walk naturally while you shoot from a distance with a longer lens. The resulting images feel like a documentary moment rather than a posed portrait, and they tend to be the photos couples treasure most years later, far more than any matching-smile shot ever could.
Group Hiking Photos That Feel Like an Adventure Not a Lineup
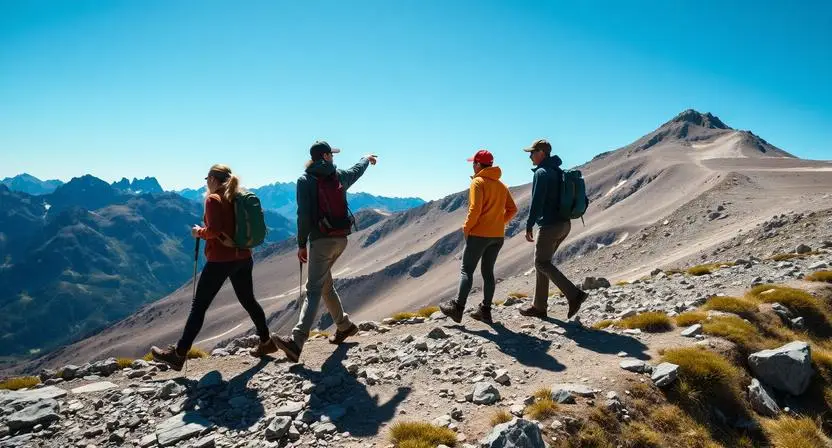
The classic mistake with group hiking photos is arranging everyone in a straight line facing the camera — it looks like a school photo, not an adventure. Instead, stagger the group across different elevations if the terrain allows, or capture them mid-walk in a loose, natural formation rather than a posed row.
Hiking photo ideas with friends work best when there’s an implied activity — everyone looking at a map together, someone pointing out a view, a shared laugh over a snack break. Trail photo storytelling angle matters here too: shooting from slightly below or behind the group as they move forward conveys momentum and shared purpose, turning a static lineup into a scene that feels like it’s part of an ongoing journey rather than a pause for the camera.
Waterfall and River Crossings — The Action Shots Everyone Wants
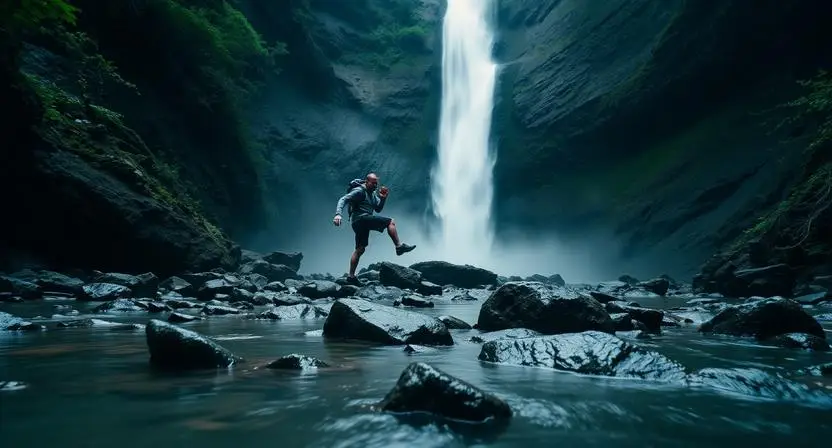
Waterfall hike photos combine two of the most photogenic elements on any trail: moving water and a natural focal point that draws the eye instantly. The challenge is balancing exposure — waterfalls are often in shaded canyons while the sky above remains bright, creating a contrast range that can blow out highlights or crush shadows if you’re not careful.
For river crossings, timing the shot mid-step — one foot on a rock, balance slightly challenged, arms out for stability — captures genuine tension and movement far better than a posed standing shot at the water’s edge. Hiking photo poses near water also benefit from including some of the water’s motion in the frame, even if it’s just a small cascade in the foreground, because it adds a sense of scale and sound that a still photo otherwise can’t convey. These shots consistently rank among the most-saved hiking trip photo ideas across travel boards.
Candid Walking Shots That Outperform Every Posed Photo Every Time
If there’s one universal truth in trail photography, it’s this: candid hiking photos almost always beat posed ones for genuine emotional impact. A candid trail walking shot, captured while someone is mid-conversation, adjusting their pace on an incline, or simply lost in the view, carries an authenticity that no amount of posing direction can replicate.
The trick is shooting in burst mode while your subject genuinely walks the trail — not performing a “walking pose” but actually hiking. How to look natural in hiking photos comes down almost entirely to this: stop directing and start documenting. Walk ahead of your group, turn around occasionally, and shoot continuously as they approach. Out of twenty frames, two or three will capture a genuine expression, a natural stride, and a moment that feels completely alive rather than constructed.
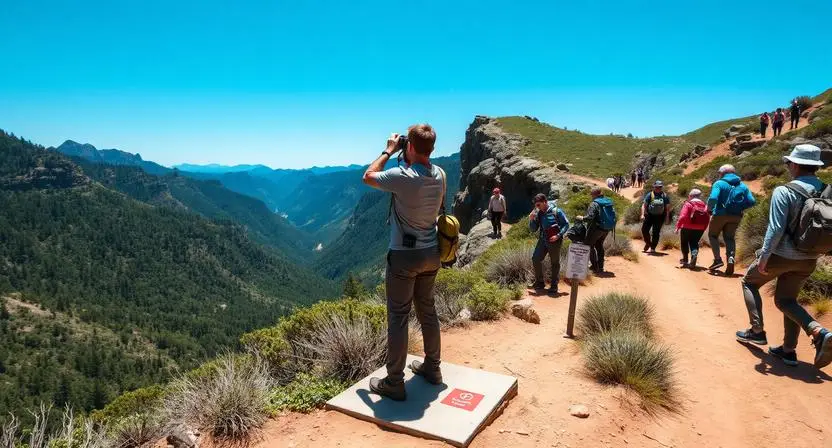
Mountain Backdrop Composition — Making the Landscape Work for You
A stunning mountain view doesn’t automatically make a stunning photo — composition is what connects your subject to that landscape meaningfully. Mountain backdrop photo composition benefits enormously from the rule of thirds hiking photo approach: placing your subject off-center, with the dominant peak or ridgeline occupying the opposite third of the frame, creates balance and visual interest that a centered subject often lacks.
Leading lines trail photo techniques — using the trail itself, a fence line, a ridge edge, or even shadows — draw the viewer’s eye from the foreground toward your subject and then onward to the mountain backdrop photo composition beyond. Mountain photography concepts that incorporate foreground elements like wildflowers, rocks, or trail markers add depth and scale, helping flatten-looking mountain ranges feel three-dimensional and immersive rather than like a painted backdrop.
| Composition Technique | What It Does | Best Used For |
|---|---|---|
| Rule of Thirds | Balances subject and landscape | Wide mountain views with a hiker |
| Leading Lines | Guides the eye through the frame | Trails, ridgelines, fences |
| Foreground Framing | Adds depth and scale | Wildflowers, rocks, trees |
| Negative Space | Emphasizes scale and solitude | Open skies, ridgelines |
| Silhouette | Creates drama and shape | Sunrise or sunset summit shots |
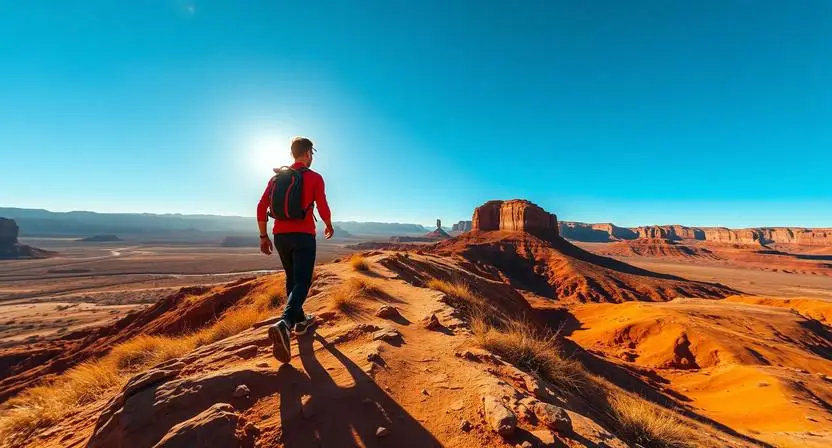
Wide Angle Versus Telephoto — Choosing the Right Lens for the Trail
Lens choice fundamentally changes how a hiking photo feels, and most people only ever use one setting without realizing the alternative exists. A trail photo wide angle shot captures the full sweep of a landscape — exaggerating depth, making foreground elements feel close and dramatic, and placing your subject within a vast environment. This is the lens choice for scale and immersion.
Telephoto lenses do the opposite: they compress distance, isolate subjects, and create that creamy hiking photo depth of field blur that separates a hiker from a distant ridge while keeping both recognizable. Canon camera hiking photography setups often pack both a wide zoom and a compact telephoto for exactly this reason — wide for establishing shots and group scenes, telephoto for portraits and isolating distant details like a hiker silhouetted on a far ridge. Neither lens is “better”; they tell different parts of the same story.
Hiking Outfit Choices That Elevate Every Photo Without Trying Too Hard
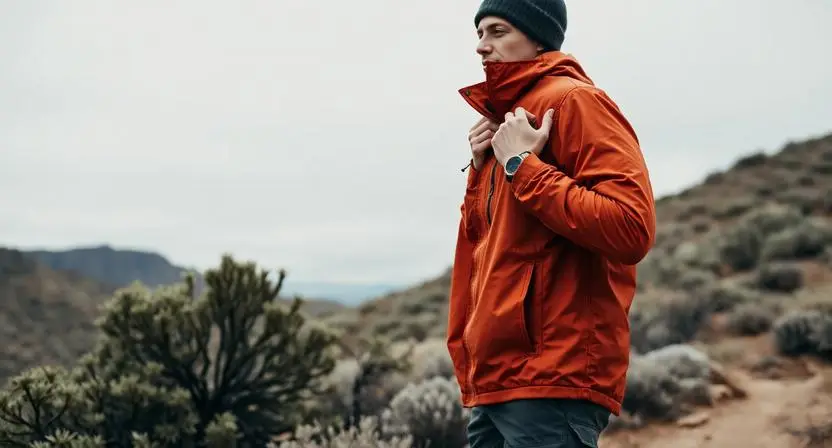
What you wear genuinely changes how your photos read against a landscape. Hiking outfit photo ideas that consistently photograph well lean toward colors that contrast with their environment — a warm rust or red jacket against green forest, or a deep blue layer against golden desert tones. Pure white and very dark colors can either blow out or disappear depending on lighting, so mid-tones with some saturation tend to be the safest bet.
Hiking pose ideas for women and hiking pose ideas for men both benefit from outfits that allow visible layering — a jacket tied around the waist, a beanie being adjusted, sleeves rolled up — because these details add texture and storytelling without requiring any extra posing effort. Functional pieces from brands associated with The North Face hiking gear or Patagonia hiking outfit lines tend to photograph well precisely because they’re designed with both performance and visual texture in mind — ripstop fabric, contrast stitching, and structured silhouettes all read clearly even from a distance.
Elevation and Perspective Tricks That Make Small Hills Look Epic
Not every hike involves a dramatic alpine summit, and that’s fine — elevation photo perspective hiking techniques can make even modest hills feel monumental. Shooting from a low angle, looking up at your subject against the sky, exaggerates height and creates a sense of grandeur even on a relatively gentle slope.
Conversely, shooting from above — if there’s a higher vantage point nearby — places your subject within the landscape and emphasizes how small a person is against nature, which often communicates scale and adventure more powerfully than a flattering close-up ever could. Trekking photo inspiration frequently uses this high-low contrast deliberately: one shot from below for drama, another from above for scale, creating a visual pair that captures the same location in two completely different emotional registers.
Rest Stop Photography — Turning Breaks Into Beautiful Quiet Moments
The moments between active hiking are often overlooked, but rest stop photography can produce some of the most genuinely beautiful images of the day. Someone sitting on a rock, eating a snack, looking out at a view with visible exhaustion and contentment — these quiet moments carry an honesty that action shots sometimes lack.
Hiking lifestyle photos built around rest stops benefit from including small details: steam rising from a thermos, boots kicked off beside a pack, a trail map spread across someone’s lap. Hiking memories photo ideas often come from these unplanned pauses rather than the planned “photo spots” — because they capture the texture of the day itself, the small rituals and tired smiles that make a hike feel real rather than curated.
Trail Storytelling — Sequencing Photos to Capture a Full Day’s Journey
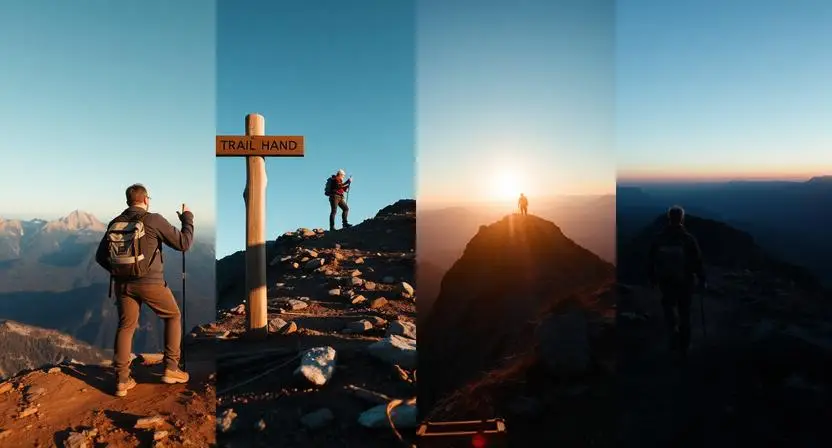
A single great photo is wonderful, but a sequence of photos that tells the story of an entire hike is far more memorable. Trail photo storytelling angle thinking means capturing the full arc — the trailhead sign at the start, the climb, the views along the way, the summit or destination, and the descent back down, including the tired-but-happy faces at the end.
Hiking trip photo ideas organized this way create a narrative that mirrors the actual emotional journey of the hike itself — anticipation, effort, reward, and reflection. Adventure travel photo ideas that follow this structure tend to perform exceptionally well on platforms like TikTok hiking content, where a “day in the life” sequence format mirrors exactly how the hike actually unfolded, giving viewers a sense of having experienced the trail themselves.
Weather and Mood — Shooting Stunning Photos in Fog Rain and Wind
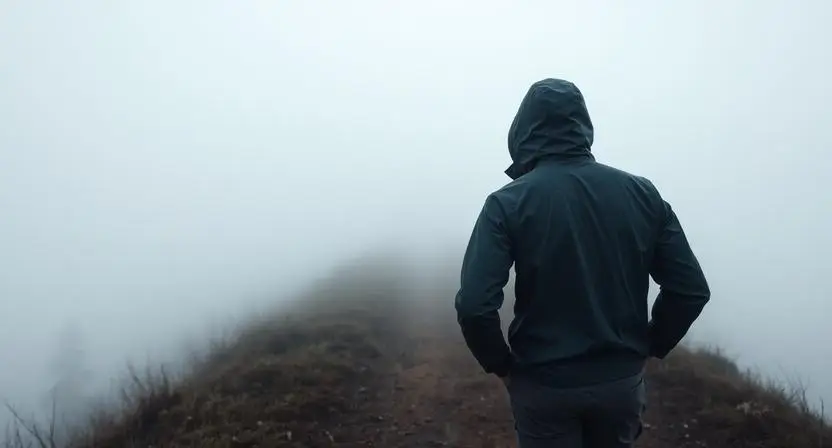
Bad weather isn’t a reason to put the camera away — it’s often when the most atmospheric photos happen. Fog softens backgrounds, creates natural depth separation, and gives mountain scenes an almost dreamlike quality that clear blue skies simply can’t replicate. Wanderlust hiking pictures shot in misty conditions often carry more mood and mystery than perfectly sunny equivalents.
Rain and wind add their own visual texture — droplets on a jacket, hair blown sideways, the specific quality of diffused light through heavy cloud cover. Scenic outdoor poses in these conditions should embrace the weather rather than hide from it: a hood pulled up, hands in pockets, walking directly into the wind. These images often communicate the genuine challenge and reward of hiking far more honestly than a sunny-day portrait, and they tend to stand out precisely because so few people bother photographing in these conditions at all.
National Park Photography — Iconic Spots and How to Shoot Them Differently
National Park hiking photos face a unique challenge: the most famous viewpoints have been photographed millions of times, and replicating the exact same shot rarely feels special. The solution is finding your own angle on a familiar location — shooting from slightly off the marked viewpoint, including a human element that’s usually absent, or visiting at a time of day most visitors skip.
Appalachian Trail photos, Pacific Crest Trail pictures, and Rocky Mountain hiking photos all share iconic, oft-repeated compositions — but a foggy early morning, a different season, or simply a different lens choice can transform a familiar scene into something that feels genuinely your own. Checking AllTrails app photos submitted by other hikers beforehand can help you identify both the popular angles to avoid and the less-photographed spots worth seeking out instead.
Editing Hiking Photos to Keep Them Authentic Not Overprocessed
Editing should enhance a hiking photo, not transform it into something the location didn’t actually look like. Subtle adjustments to contrast, shadow detail, and color temperature can bring out the mood that was genuinely present — without pushing saturation or sharpening to the point where skies turn unnaturally electric blue or foliage glows with an artificial green.
A light touch on hiking photo poses during editing means correcting exposure and white balance first, then making small, deliberate adjustments rather than applying heavy presets across the board. The goal is for someone who was actually there to look at the photo and recognize the place — not feel like they’re looking at a different location entirely. Authenticity, especially in outdoor explorer photography, tends to age far better than over-processed trends that look dated within a year or two.
Phone Versus Camera — What Actually Works Best on the Trail
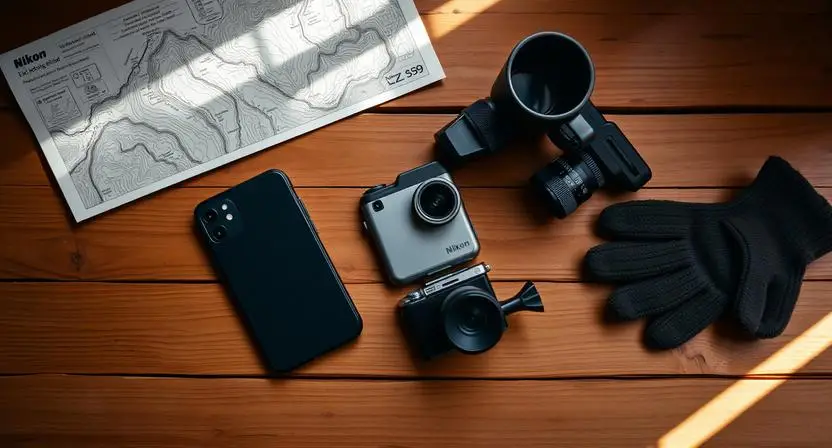
The honest answer is that both have a place, and the right choice depends on what you’re prioritizing. iPhone hiking photography has improved dramatically — computational photography handles dynamic range, low light, and even some depth-of-field effects impressively well, and the convenience of always having it ready means you capture more spontaneous moments.
Dedicated cameras still offer advantages for specific situations: Canon camera hiking photography setups with interchangeable lenses allow for genuine telephoto compression and wider dynamic range in tricky lighting, which matters for serious landscape work. GoPro hiking footage and DJI drone hiking shots add entirely different perspectives — action angles and aerial views that neither a phone nor a traditional camera can replicate. For most hikers, a phone covers 90 percent of needs, with a camera or drone reserved for specific, planned shots where the extra gear weight is worth it.
Safety and Etiquette While Taking Photos on Popular Hiking Trails
Getting the perfect shot should never come at the cost of safety or respect for other trail users. Stepping off marked trails to reach a “better angle” damages fragile vegetation and soil, and many of the most photographed locations have suffered visible erosion from photographers repeatedly trampling the same unofficial spots.
Etiquette also means being mindful of other hikers — don’t block narrow trail sections for extended photo sessions, and be aware that a tripod or extended posing session can create bottlenecks on popular routes. Best hiking photo ideas for beginners should always include a quick assessment: is this spot safe, is it sustainable, and am I respecting the people around me? The best photo in the world isn’t worth an injury, environmental damage, or a frustrated encounter with fellow hikers trying to enjoy the same trail.
Frequently Asked Questions
What are the best poses for hiking photos?
Best poses for hiking photos generally avoid stiff, camera-facing positions in favor of natural movement — walking, looking at the view, adjusting gear, or sitting on a rock with a relaxed posture. A slight turn of the body, one knee bent, and eyes directed toward the landscape rather than the lens consistently produce more natural, engaging results than a straight-on standing pose.
How do I take good hiking photos alone?
How to take good hiking photos alone is easiest with a small tripod and either a phone timer or a remote shutter. Set up your shot, walk into frame, and repeat a natural action like walking or adjusting your pack across several takes. Using the landscape as a co-star — positioning yourself small within a wide scene — also produces compelling solo shots without needing a second person.
What’s the best time of day for hiking photos?
Golden hour — shortly after sunrise or before sunset — produces the most flattering, dramatic light for hiking photos. Golden hour hiking photography creates warm tones, long shadows, and soft contrast that midday sun simply can’t match. If your schedule allows it, planning even one portion of your hike around this window dramatically improves your results.
How can I make group hiking photos look natural?
Avoid lining everyone up facing the camera. Instead, capture the group mid-walk, staggered across different points on the trail, or engaged in an activity like checking a map. Group hiking photos that feel like a genuine moment rather than a posed lineup almost always involve some implied action or interaction between the people in frame.
Should I use my phone or a camera for hiking photography?
Both have strengths. iPhone hiking photography is convenient, lightweight, and increasingly capable, covering most everyday needs. A dedicated camera offers more control over depth of field, dynamic range, and telephoto compression for serious landscape or portrait work. Many hikers use a phone for spontaneous shots and bring a camera only for planned, specific compositions.
Conclusion
Hiking poses photo ideas aren’t about turning every trail outing into a photoshoot — they’re about closing the gap between how a hike felt and how it looks afterward. From golden hour timing to candid walking shots, from summit silhouettes to quiet rest stop moments, the techniques covered here all share one underlying principle: authenticity photographs better than performance. The next time you’re out on the trail, you don’t need to overthink every shot. Just bring a little awareness of light, composition, and movement — and let the trail do the rest. The story is already there. These ideas just help you capture it properly.
1 Comment