
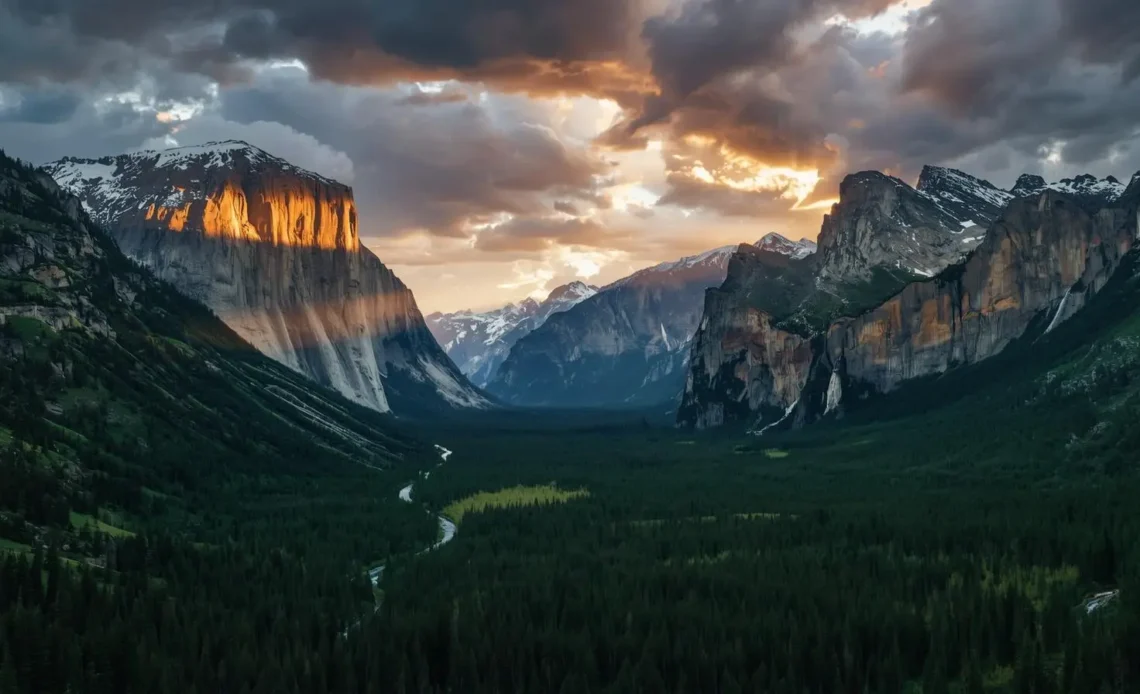
Most photographers pick up a camera and point it at something beautiful. Great landscape photographers do something fundamentally different — they study light, read weather, learn terrain and then wait with the patience of a geologist. Landscape photography isn’t about being in a pretty place. It’s about being in the right place at the exact right moment with the technical mastery to capture what your eyes are seeing and your chest is feeling simultaneously.
Ansel Adams landscape photography style defined an entire visual language for how Americans understand wilderness. His zone system, his pre-visualization philosophy and his absolute reverence for natural light still influence working photographers decades after his death. National Geographic landscape photography raised the bar further — demanding not just technical excellence but genuine narrative power in every frame. This guide delivers both dimensions in full.
Why Landscape Photography Rewards Patience the Way No Other Genre Ever Will
Portrait photographers wait minutes. Street photographers wait seconds. Landscape photography asks you to wait hours, return across multiple seasons and sometimes spend years pursuing a single image that exists fully formed only in your imagination. That temporal investment separates the genre from almost every other discipline in photography and it’s precisely what makes the reward so disproportionately satisfying when everything finally aligns.
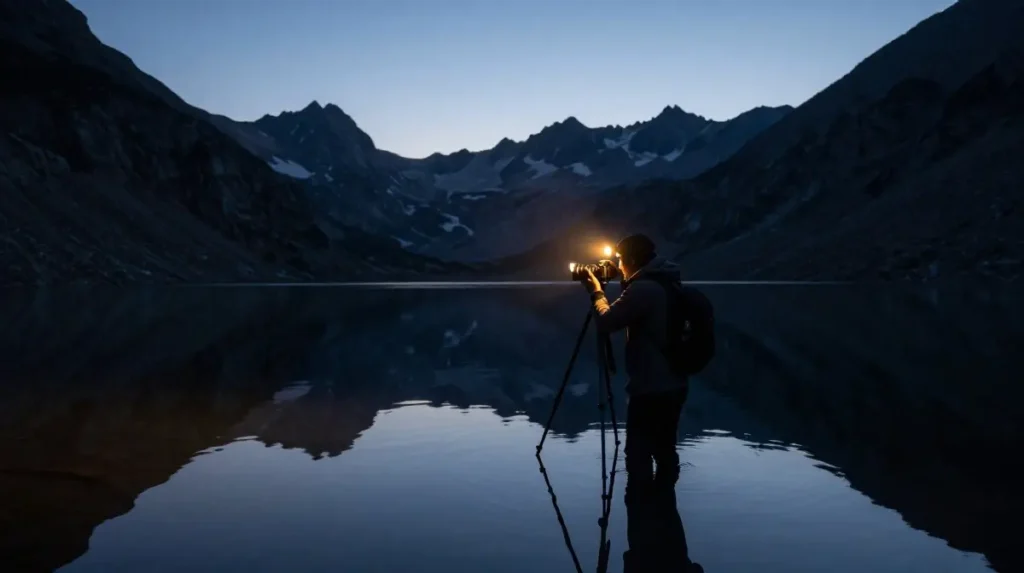
Photographic storytelling outdoors demands emotional investment that technical skill alone cannot replace. The photographer who drives to a location, shoots for twenty minutes and drives home rarely produces work that resonates. The photographer who hikes in the previous evening, camps at the location, watches the stars rotate overhead and rises before dawn to position themselves for first light — that person has earned the image before the shutter ever fires. Wilderness photography at its finest is a form of devotion and the landscape rewards devotion with light that casual visitors never witness.
The Camera Gear That Actually Matters and the Gear You’re Wasting Money On
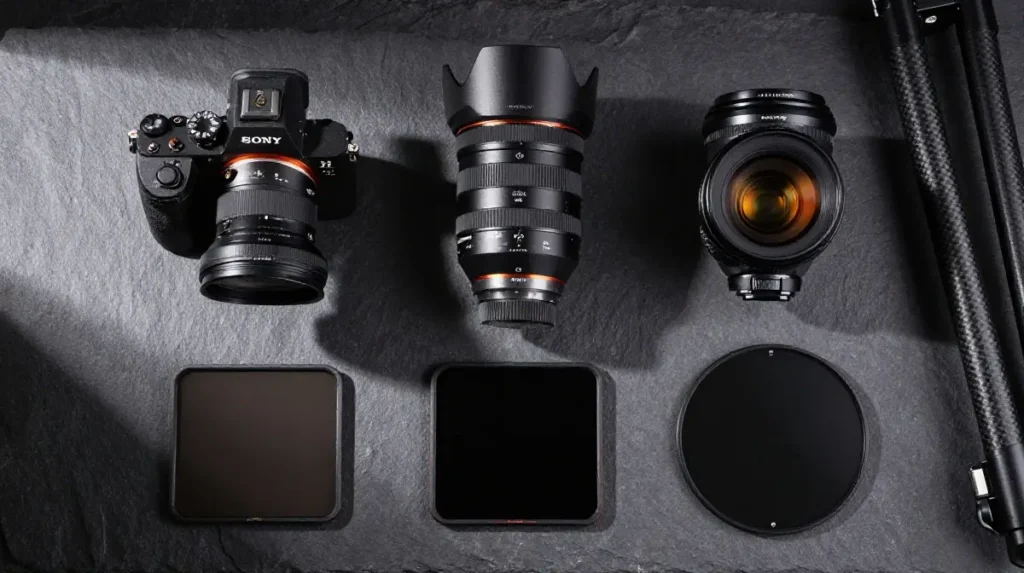
Gear conversations dominate online photography communities yet experienced landscape photographers consistently report that their best images came from moments when they used what they had rather than waiting for what they wanted. That said, certain equipment decisions genuinely matter. Best camera for landscape photography in 2024 centers on sensors with exceptional dynamic range — the Sony A7R V landscape camera with its 61-megapixel back-illuminated sensor captures shadow and highlight detail simultaneously that simply wasn’t possible five years ago.
Landscape photography equipment priorities in order of actual impact: lens quality first, tripod stability second, filters third, camera body last. A mediocre camera on a Really Right Stuff tripod landscape platform with a premium prime lens outperforms an expensive camera body on a flimsy tripod with a kit lens every single time. Fujifilm GFX landscape medium format and Phase One landscape camera system deliver extraordinary resolution for large format printing but neither is necessary for exceptional work — what they offer is ceiling, not floor. Spend your first $2,000 on glass and support rather than bodies and you’ll thank yourself consistently.
| Equipment Priority | Investment Level | Real World Impact |
|---|---|---|
| Prime wide angle lens | High | Maximum |
| Quality carbon fiber tripod | High | Very High |
| ND and polarizing filters | Medium | High |
| Camera body upgrade | Very High | Moderate |
| Remote shutter release | Low | High for long exposure |
| Extra batteries and cards | Low | Essential |
Landscape Photography Settings: The Exact Numbers That Work in the Real World
What camera settings to use for landscape photography is the question every beginner asks first and the answer is more nuanced than most online tutorials admit. The universal starting point is aperture f/8 to f/11 — this range delivers peak sharpness on virtually every lens in production by avoiding both the softness of wide-open apertures and the diffraction limit landscape aperture degradation that begins above f/16 on most sensors.
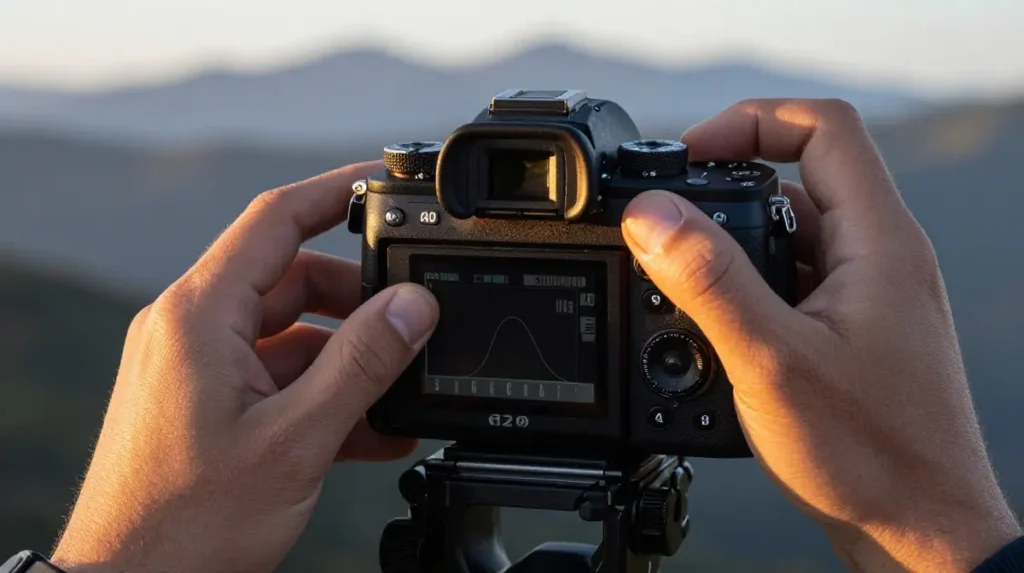
How to shoot landscape photography in manual mode gives you complete control over the exposure triangle but requires understanding histogram reading landscape exposure rather than relying on the camera’s meter. Set your ISO as low as your light conditions allow — ISO 64 or 100 on clear days, rising to ISO 400 to 800 as light dims. Landscape photography RAW vs JPEG is not a debate — always shoot RAW. White balance landscape photography set to daylight or shade in-camera gives you an accurate preview but RAW files allow complete white balance adjustment in post without any quality penalty whatsoever.
| Condition | Aperture | ISO | Shutter Speed |
|---|---|---|---|
| Bright daylight | f/8–f/11 | 64–100 | 1/125–1/500s |
| Golden hour | f/8–f/11 | 100–400 | 1/30–1/125s |
| Blue hour | f/8 | 400–800 | 1–30s |
| Night/Milky Way | f/2.8–f/4 | 1600–6400 | 15–25s |
| Long exposure water | f/11 | 64–100 | 1–30s with ND |
Golden Hour and Blue Hour: Why Serious Photographers Live by These Two Windows
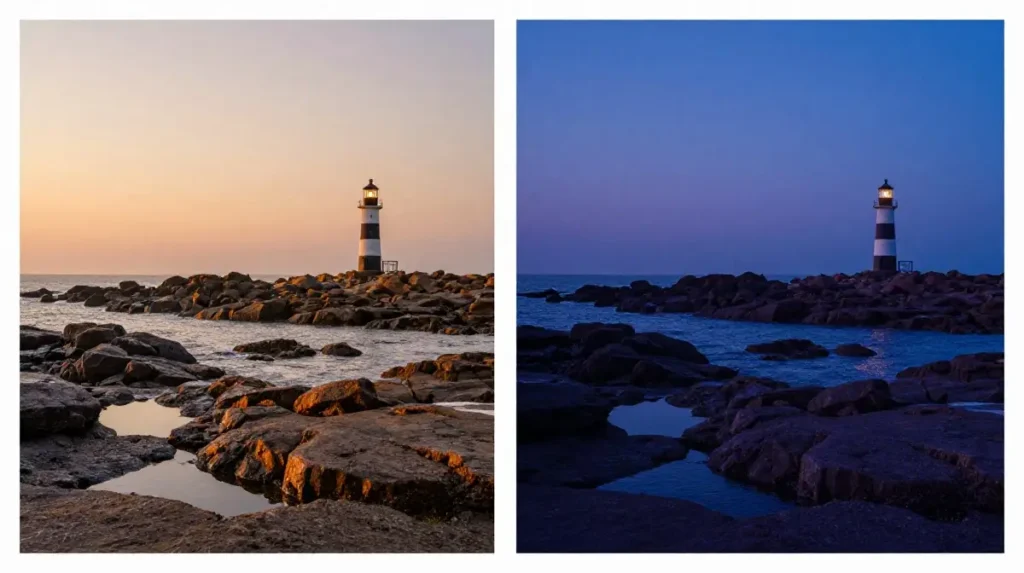
What is the best time of day for landscape photography has a definitive answer that experienced photographers have internalized completely: the two hours surrounding sunrise and sunset. Golden hour photography delivers directional warm light that rakes across terrain at a low angle, creating the long shadows and three-dimensional texture that midday light destroys by falling straight down and flattening everything it touches.
Blue hour — the 20 to 30 minutes before sunrise and after sunset — produces something equally valuable but fundamentally different. Natural light photography during blue hour gives you a cool ambient luminosity that eliminates harsh shadows entirely while retaining enough light to capture detail across the full scene. Landscape photography lighting during blue hour also balances almost perfectly with artificial light sources making it ideal for scenes that include lighthouses, mountain villages or any built structure illuminated from within. Set your alarm 90 minutes before sunrise every time — the pre-dawn walk to your position in darkness is part of the ritual that earns you the light.
How to Find Locations That Stop Scrolling Thumbs Dead in Their Tracks
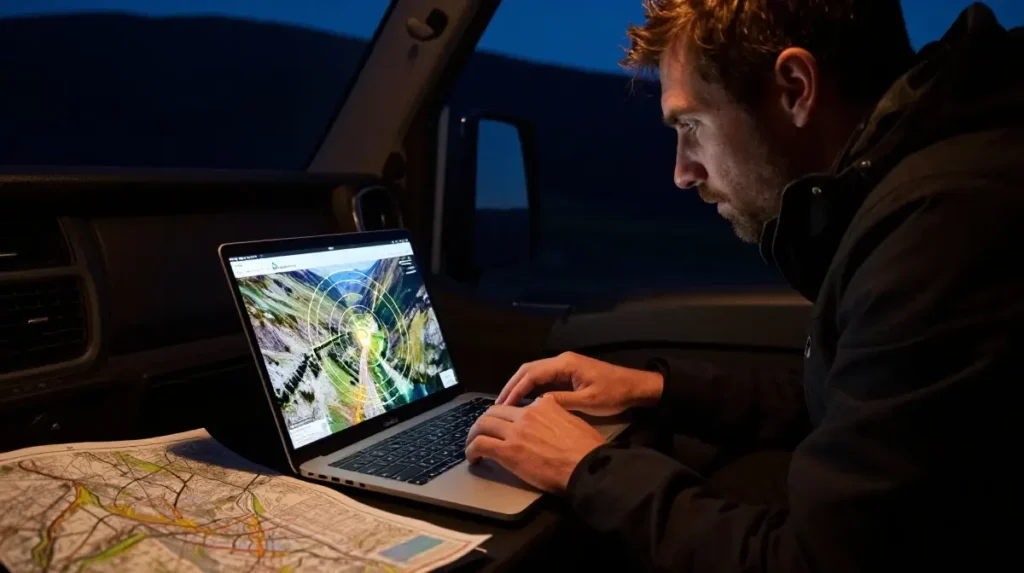
How to find good landscape photography locations separates productive photographers from those who drive aimlessly hoping to stumble onto something extraordinary. Google Maps location scouting photography using satellite view allows you to identify promontories, water bodies, canyon edges and forest clearings from your desk before committing a single mile of driving. Cross-reference with 500px landscape photography community and ViewBug landscape photography contests to understand what has been photographed extensively and where genuine discovery opportunities still exist.
Scenic vista photography scouting goes deeper than online research. Apps like PhotoPills and The Photographer’s Ephemeris overlay sun and moon position data onto topographic maps allowing you to calculate exactly where golden hour light will fall on a specific peak on a specific date months in advance. How to shoot landscape photography in low light requires knowing your location intimately before the light drops — navigating unfamiliar terrain in darkness while carrying tripod and camera is both dangerous and inefficient. Visit in daylight first, identify your exact position and return when the light delivers what your research promised.
Composition Rules That Transform Ordinary Scenes into Arresting Visual Stories
How to compose a landscape photograph effectively requires understanding that compositional rules are not restrictions — they’re frameworks your eye recognizes as satisfying before your conscious mind processes why. Photography rule of thirds places your horizon on either the upper or lower third of the frame rather than the center, immediately creating tension and visual weight that centered compositions consistently lack. When the sky is dramatic, give it two-thirds. When the foreground is rich, flip that ratio without hesitation.
you may also like this:22 Yellowstone Aesthetic Ideas for Stunning Nature Inspiration
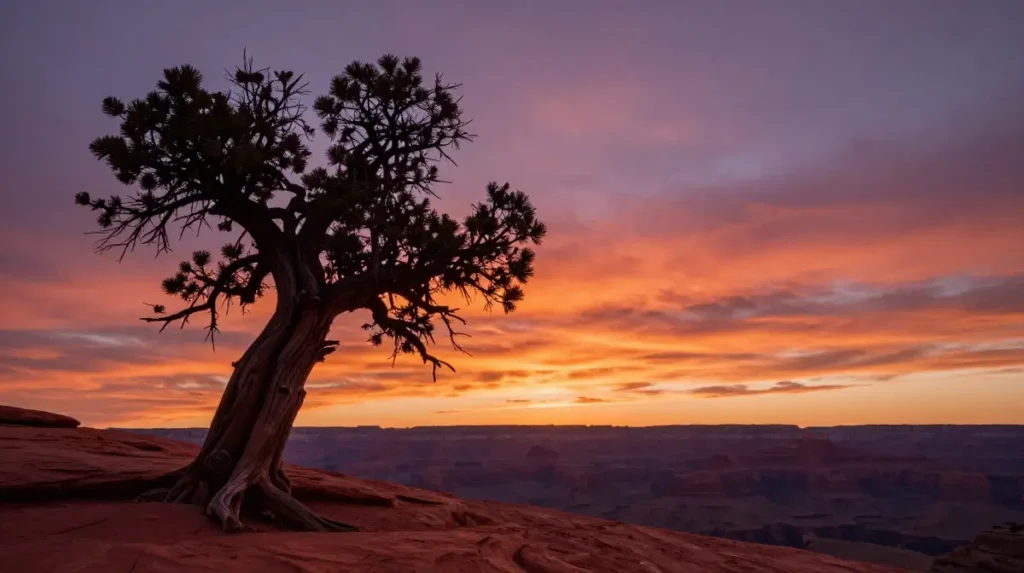
Leading lines in photography guide the viewer’s eye through the frame along a deliberate visual path — a winding river, a fence line, a mountain ridge, a road curving toward the horizon. The most powerful leading lines begin in the lower corners of the frame and draw the eye toward a strong subject in the upper middle ground. Negative space photography composition works equally powerfully in the opposite direction — a lone tree against a vast empty sky creates emotional resonance precisely through restraint. Outdoor scene composition mastery comes from photographing the same scene with multiple compositional approaches during every session rather than assuming your first instinct is your best one.
Mastering Foreground Interest: The Element That Separates Amateurs from Experts
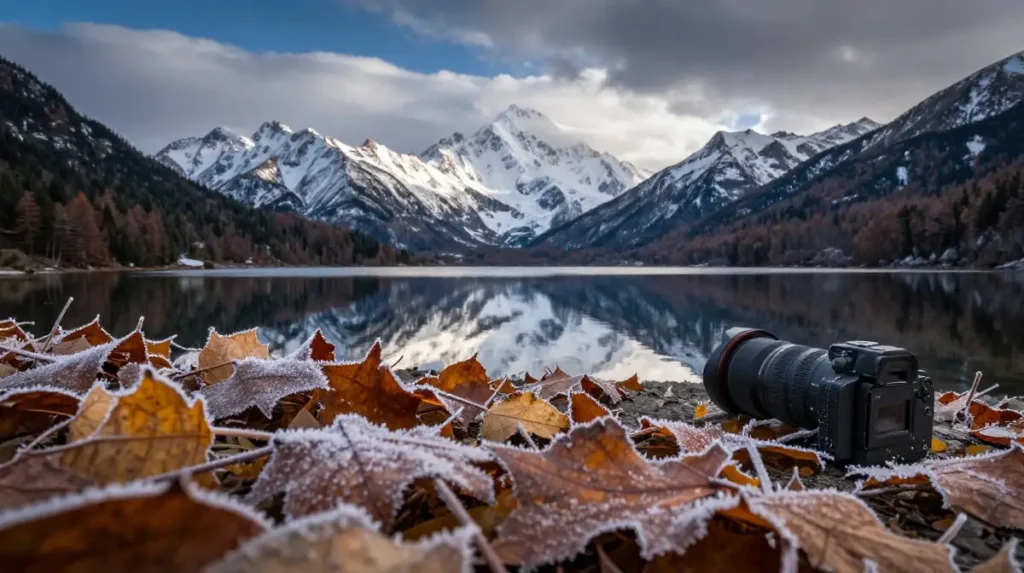
Foreground interest photography is the single most transformative compositional concept in the entire landscape genre. An image without foreground interest reads as flat — it presents the scene as a wall rather than a space the viewer can enter. Strong foreground interest — wildflowers, tide pool reflections, frost-covered rocks, leading gravel paths — creates the illusion of three-dimensional space and invites the eye to travel through the frame rather than simply land on it.
How to create depth in landscape photos through foreground interest requires getting physically lower and closer to your foreground subject than feels comfortable initially. Most photographers stand at eye level and wonder why their wide angle shots feel disconnected. Get your tripod low — sometimes with the center column horizontal and the camera six inches from the ground. Wide angle landscape photography earns its reputation precisely in this application — the combination of low camera position, strong foreground subject and expansive background creates the sense of spatial depth that defines the best landscape images in any portfolio. Landscape photo composition built on strong foreground interest consistently outperforms technically superior images that neglect this foundational principle.
Wide Angle Lenses Explained: What They Do and When to Put Them Away
What lens is best for landscape photography produces a more complex answer than most beginners expect. Wide angle lenses — typically 14mm to 35mm on full frame — are the default choice and for good reason. They capture vast sky, expansive terrain and allow close foreground subjects to coexist with distant backgrounds in a single frame. The Canon EF 16-35mm landscape lens and Nikon Z 14-30mm wide angle lens represent the professional standard for this application delivering corner-to-corner sharpness that consumer kit lenses cannot match.
However wide angle lenses compress distant subjects dramatically and flatten the apparent scale of mountains, rock formations and other remote landmarks. A telephoto lens — 70mm to 200mm — stacks visual planes together and creates a sense of compressed grandeur that wide angle shots simply can’t replicate. Mountain landscape photography often benefits from a 70-200mm perspective that makes distant peaks appear enormous against each other rather than small dots on a wide horizon. Chromatic aberration landscape lenses appears most aggressively at the edges of wide angle frames at wide apertures — always stop down to f/8 minimum and use Adobe Lightroom landscape editing lens correction profiles to eliminate residual fringing in post-processing.
Long Exposure Landscape Photography: Water Silk Clouds and Light Trails Done Right
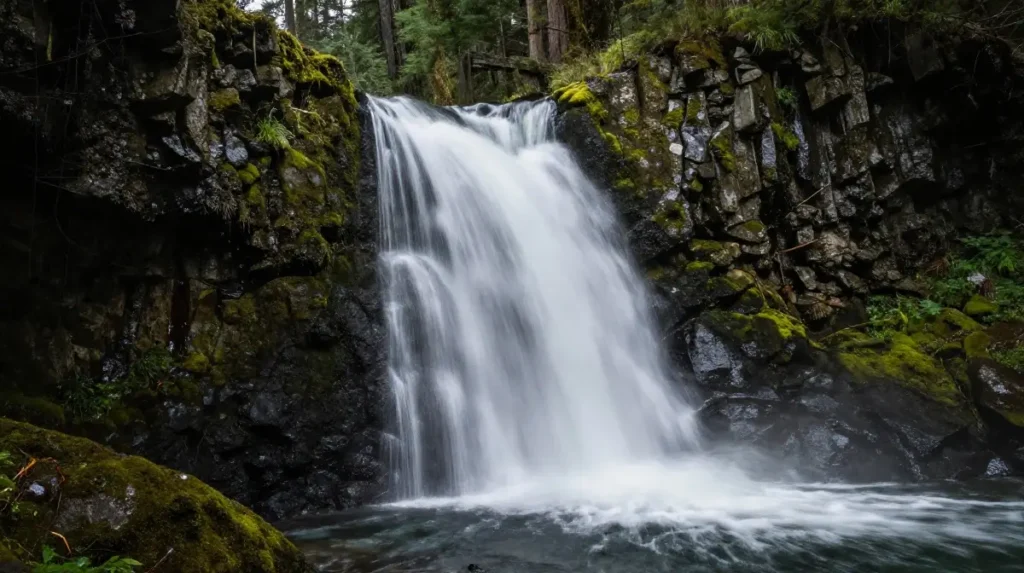
Long exposure landscape photography transforms moving elements into something the human eye never actually sees — waterfalls become silken ribbons, ocean waves dissolve into smooth fog, clouds streak across the sky in painterly arcs. That transformation is precisely why long exposure work holds such enduring appeal and why it remains one of the most technically demanding disciplines within the broader genre.
How to photograph waterfalls and rivers with long exposure requires shutter speeds between 0.5 and 4 seconds for most waterfall silk effects — shorter than that and you freeze too much motion, longer and you lose all texture in the water. ND filter stops landscape photography selection drives this calculation — a 6-stop ND filter in bright daylight converts a 1/500s base exposure to approximately 2 seconds which falls perfectly in the waterfall sweet spot. How to capture movement in landscape photography beyond water includes cloud streaking at 30 to 120 seconds and star trails beginning at 15 to 20 minutes — both require ND filter stops landscape photography knowledge and precise pre-calculation before mounting your camera.
Tripod Technique and Camera Stability: The Non-Negotiable Foundation of Sharp Images

How to use a tripod for landscape photography correctly involves more than simply mounting your camera and walking away. Every point of contact between your camera and the ground transmits vibration — a lesson most photographers learn expensively after examining their first long exposure images at 100 percent magnification and finding soft edges where they expected razor sharpness. Extend the thicker leg sections first, avoid the center column when possible and always use a remote shutter release or two-second timer delay to eliminate camera shake from your finger pressing the shutter button.
Landscape photography for beginners consistently underestimates how dramatically wind affects tripod-mounted cameras during long exposures. Even a gentle breeze causes measurable vibration in carbon fiber tripods — hanging your camera bag from the center column hook adds downward mass that dampens oscillation significantly. The Really Right Stuff tripod landscape platform uses Arca-Swiss compatible ball heads that allow precise repositioning without introducing twist or drift during exposure. How to get sharp landscape photos ultimately depends more on stable support and proper technique than on camera body specification — a perfectly executed image on a mid-range body consistently outperforms a sloppy execution on a flagship sensor.
Landscape Photography in Harsh Light: How to Shoot When the Conditions Fight You
How to shoot landscape photography in harsh sunlight forces photographers to develop creative solutions rather than simply waiting for better light. Midday sun creates problems — deep shadows under vegetation, blown highlights on reflective surfaces and flat directionless illumination that removes all texture from terrain. But those problems are solvable with the right approach.
Dramatic sky photography opportunities peak during and immediately after summer thunderstorms that build dramatically in afternoon hours — the combination of dark storm clouds, occasional light breaks and rain-washed clarity creates images that golden hour alone can’t produce. How to shoot landscape photography in low light under forest canopy at midday works beautifully because the canopy itself diffuses harsh sunlight into soft even illumination perfect for forest photography techniques. Landscape photography dynamic range challenges in harsh midday light are manageable through exposure blending landscape photography — bracketing three to five exposures across a 3-stop range and blending them in post preserves detail across the full tonal range that a single exposure cannot contain.
Filters Demystified: ND Graduated ND and Polarizers Ranked by Real World Value

How to use filters for landscape photography intelligently requires understanding what each filter type actually does rather than what marketing materials claim. Three filter categories deliver genuine in-field value that no amount of post-processing can fully replicate. A polarizing filter landscape color eliminates surface reflections from water and wet rocks while simultaneously deepening blue sky saturation and cutting atmospheric haze — effects that sky replacement landscape editing software cannot authentically recreate.
Graduated ND filter landscape sky use allows you to balance a bright sky against a darker foreground by placing the filter’s gradient at the horizon line — reducing sky exposure by 2 to 4 stops without affecting the ground below. Singh-Ray graduated ND filter and Lee Filters landscape photography systems represent the professional benchmark with optical quality that avoids the color cast problems plaguing cheaper alternatives. Breakthrough Photography filters offer excellent value at the prosumer level. ND filter stops landscape photography for long exposure work ranges from 6-stop for waterfalls in bright light to 10 or 15-stop for extreme daytime long exposures — always calculate your final shutter speed before mounting the filter since exposure calculation through an opaque 10-stop ND requires a neutral density exposure calculator app.
How to Read Weather Like a Landscape Photographer and Turn Storms into Gold
Weather and photography conditions understanding separates photographers who produce consistent extraordinary work from those who depend entirely on luck for their best images. Weather apps like Windy, Clear Outside and Weather Underground provide hyperlocal forecast granularity that national weather services don’t offer — wind speed at altitude, cloud layer height, precipitation probability by the hour and visibility forecast are all critical planning variables.
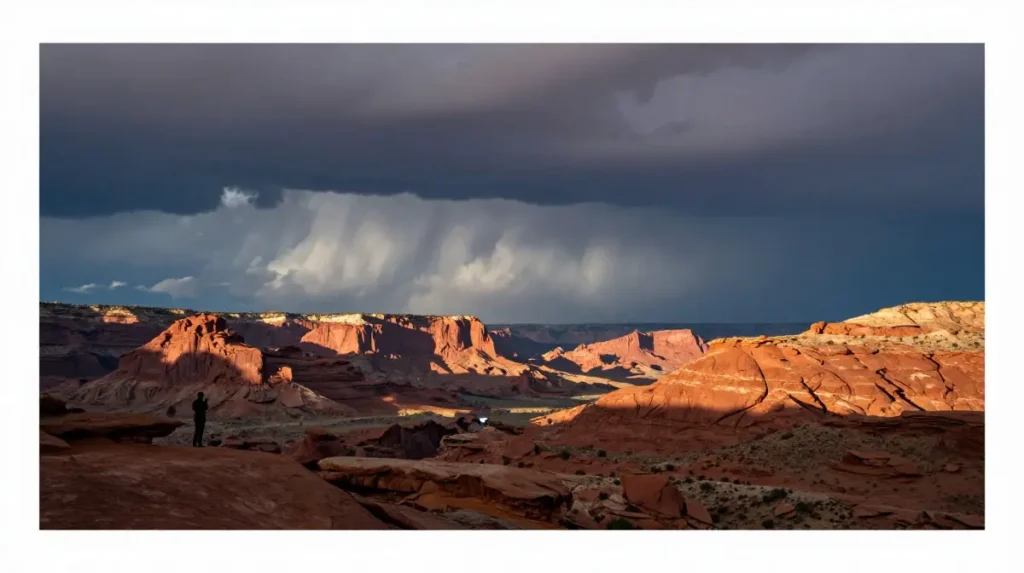
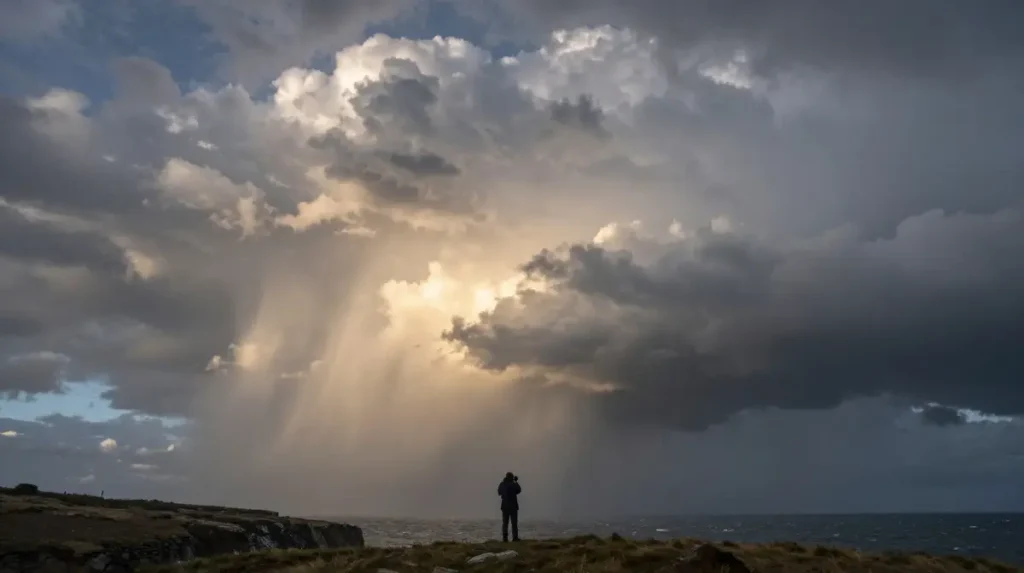
Dramatic sky photography opportunities concentrate in the transition zones between weather systems — the hour before a storm arrives and the hour after it passes produce some of the most dramatic atmospheric lighting in all of outdoor photography techniques. Storm light breaks through clouds at low angles, illuminates individual landscape elements against dark storm backgrounds and creates the kind of theatrical contrast that makes viewers assume images were digitally enhanced when they weren’t. Nature color palette photography during storm light shifts into deeply saturated earth tones, electric greens and vivid amber that midday light never produces — chase the storms and your portfolio will show it immediately.
Mountain Seascape Desert and Forest: How Each Terrain Demands a Different Approach
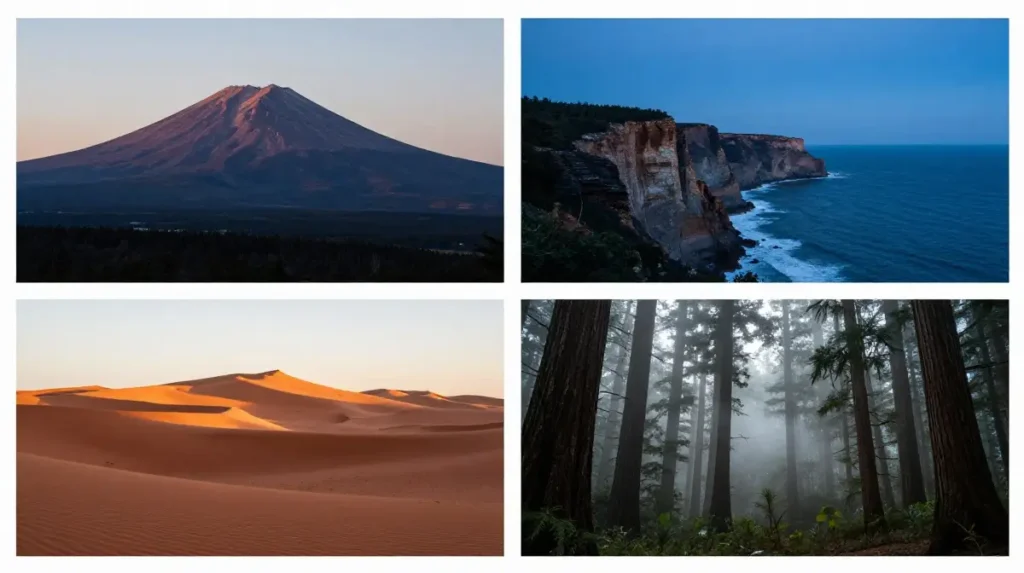
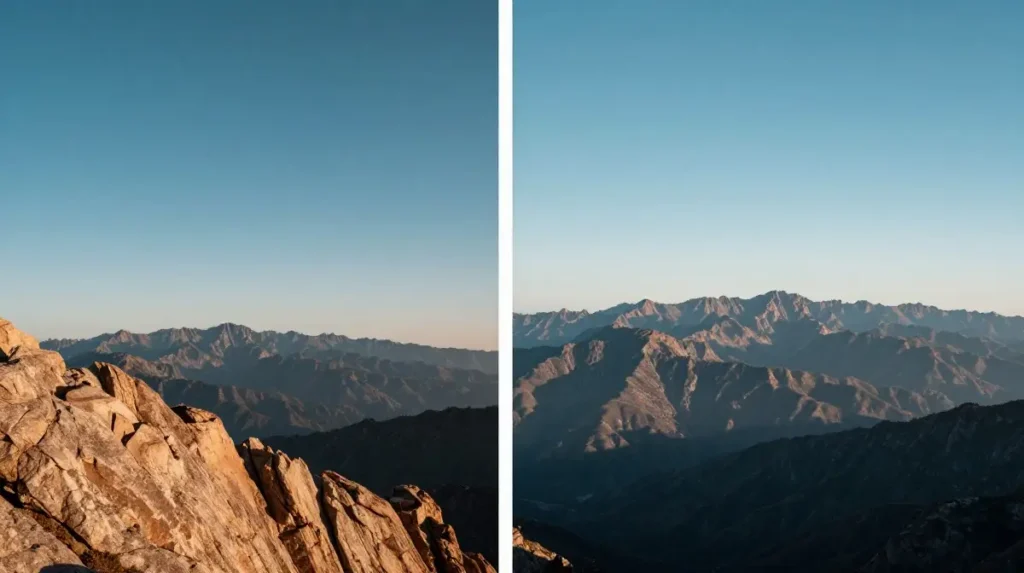
Mountain landscape photography requires understanding that mountains create their own weather systems. Summit conditions change within minutes and afternoon thunderstorms build predictably across most western US ranges between 1pm and 4pm during summer months. Position yourself below treeline before noon if storms threaten and use telephoto compression to stack multiple ranges against each other for maximum visual drama. Seascape photography tips center on tide timing — low tide exposes rock formations, tide pools and wet sand that creates mirror reflections while high tide produces dramatic wave action against rocky headlands.
Desert landscape photography rewards photographers willing to work in temperature extremes that most people avoid. Summer desert at 6am in Death Valley delivers light of extraordinary quality across sand dune formations before heat haze begins degrading clarity by 8am. Forest photography techniques work best in overcast conditions — diffused light under cloud cover eliminates the dappled shadows that make forest interiors so difficult to expose consistently in direct sun. Each terrain type rewards different equipment, different timing and fundamentally different compositional thinking — mastering all four makes you a truly versatile practitioner of scenic photography ideas rather than a specialist who struggles outside one familiar environment.
Landscape Photography: The Hyperfocal Distance Method Nobody Teaches Beginners
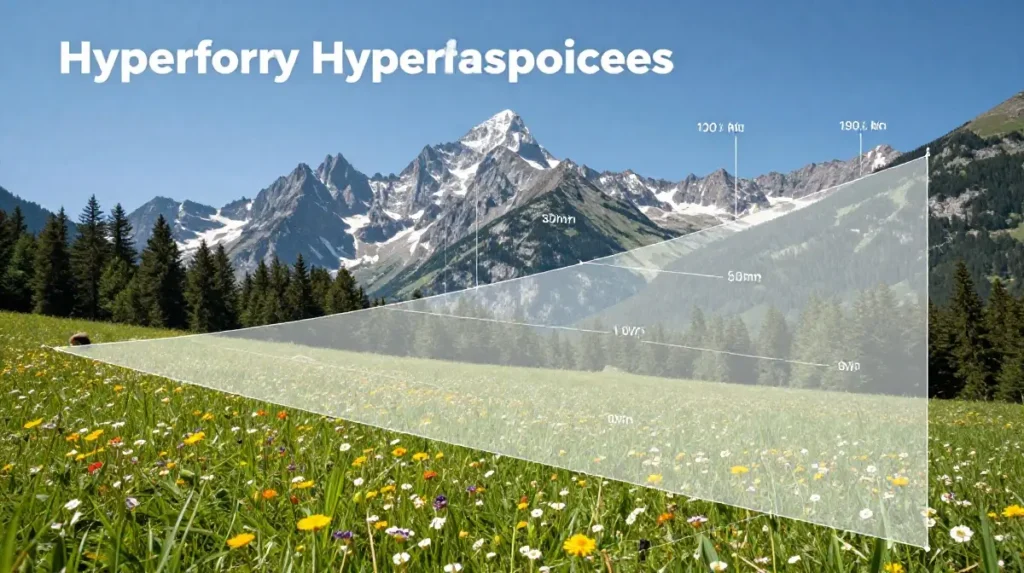
Hyperfocal distance landscape photography is the technique that delivers front-to-back sharpness across an entire frame — the technical foundation of the “everything in focus” look that defines classic landscape imagery. The hyperfocal distance is the closest focusing distance at which objects at infinity remain acceptably sharp. Focus at this distance and everything from half that distance to infinity falls within acceptable sharpness range simultaneously.
Calculating hyperfocal distance landscape photography requires knowing your sensor size, your focal length and your chosen aperture. At f/11 with a 24mm lens on a full frame sensor, hyperfocal distance falls at approximately 5.5 meters — focus at that distance and everything from 2.75 meters to infinity appears sharp in the final image. Landscape photography tips for applying this in the field: use the free app PhotoPills which calculates hyperfocal distance in real time for your specific camera and lens combination. How to get sharp landscape photos using hyperfocal distance consistently produces better results than autofocus targeting a distant subject because it maximizes the total depth of field rather than simply ensuring the far background is sharp at the expense of foreground detail.
Focus Stacking and Exposure Blending: Advanced Techniques Worth Learning Now
Focus stacking landscape technique solves the problem that hyperfocal distance cannot — when your foreground subject sits closer than your hyperfocal distance and must appear perfectly sharp alongside an infinity-focused background. You shoot multiple frames focused at different distances — typically three to five exposures stepping focus from near foreground to far background — then blend them in post-processing software that detects the sharpest region of each frame and composites them into a single image with complete front-to-back sharpness.
Exposure blending landscape photography addresses the dynamic range challenge that single exposures and even graduated ND filters sometimes cannot solve. Shoot a bracket of three to five exposures at one-stop intervals — one exposed for the highlights, one for the midtones and one for the shadows — then blend them manually using luminosity masking landscape photography techniques in Photoshop. Luminosity masking landscape photography creates selection masks based on pixel brightness values allowing you to blend only the highlight data from your darkest exposure and only the shadow data from your brightest exposure with extraordinary precision. Capture One landscape photo editing and Photoshop both support luminosity masking workflows and both produce results that single-exposure HDR software approaches cannot match for natural quality.
Editing Landscape Photos in Lightroom: The Workflow That Protects Natural Beauty

How to edit landscape photos in lightroom efficiently requires a consistent workflow rather than ad-hoc adjustment decisions made differently on every image. Adobe Lightroom landscape editing workflow begins with lens correction and chromatic aberration removal before any creative adjustments — these are technical corrections not creative choices and applying them first gives you an accurate baseline to work from. Raw file editing photography in Lightroom’s Develop module then proceeds through global exposure corrections before any local or targeted adjustments.
Landscape photography editing in Lightroom’s 2024 version benefits from AI-powered masking that selects sky, ground and subject with remarkable accuracy — what previously required fifteen minutes of manual gradient work now takes thirty seconds. Histogram reading landscape exposure during editing confirms whether your RAW file contains full tonal detail across shadows and highlights before committing to any creative processing direction. Photo post processing techniques for landscape work prioritize clarity and texture sliders — both reveal micro-contrast in rock faces, foliage and cloud formations that flat global contrast adjustments miss entirely. Never push saturation globally — instead use HSL color adjustments to target specific hue ranges individually for natural results that heavy-handed saturation boosts never achieve.
Color Grading and Luminosity Masking: Where Good Landscape Photos Become Great
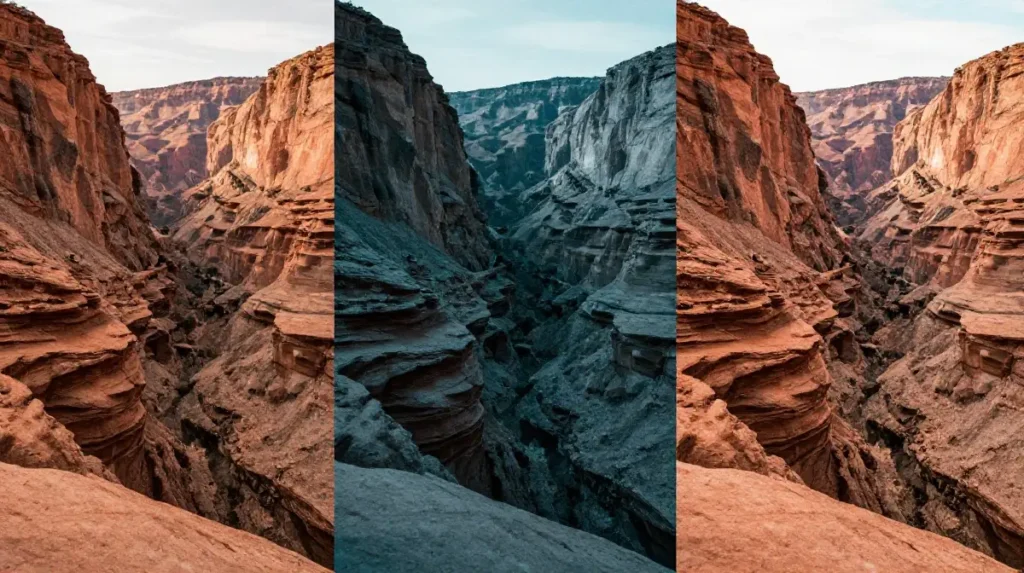
Color grading landscape photos is where technical processing ends and artistic interpretation begins. The most respected landscape photographers develop a recognizable color signature — a tonal palette that recurs across their body of work and makes their images identifiable before you see their name. Nature color palette photography grading typically involves cooling shadows toward teal or blue while warming highlights toward amber or gold — a split toning approach that creates visual warmth and depth simultaneously without the garish oversaturation that amateur edits display.
Luminosity masking landscape photography in Photoshop allows targeted color grading with a precision that Adobe Lightroom landscape editing global tools cannot match. Create a luminosity mask targeting only the midtone values of your sky and shift those values toward a deeper blue without affecting clouds or land — the result reads as naturally dramatic rather than digitally manipulated. Sky replacement landscape editing remains controversial among purists but when used to replace a genuinely blank white sky with a period-accurate sky from the same shooting session it falls within most ethical landscape editing frameworks. Panoramic stitching landscape photography in Lightroom’s Photo Merge function creates ultra-high-resolution files that reveal fine detail at large print sizes that single frames from any camera cannot produce.
Drone Aerial Landscape Photography: Rules Risks and Rewards from Above

DJI drone aerial landscape shots have democratized a perspective that previously required helicopter rentals costing thousands of dollars per hour. The aerial viewpoint reveals patterns, geometries and color relationships in terrain that ground-level shooting completely obscures — river meanders, forest canopy texture, coastal rock formation geometry and agricultural field patterns all read with extraordinary visual richness from above. Environmental photography from drone altitude creates a simultaneous sense of intimacy and immensity that no other photographic approach replicates.
FAA regulations govern drone operation across all US airspace and landscape photography practitioners must understand them before launching anywhere. Class G uncontrolled airspace below 400 feet AGL requires no authorization but national parks, wilderness areas and most public lands managed by federal agencies prohibit drone use entirely without specific permits. Scenic vista photography from drones near airports requires LAANC authorization through apps like AirMap or Aloft — approval takes seconds in most cases but operating without it risks significant fines and equipment confiscation. Register your drone with the FAA, carry proof of registration and always check temporary flight restrictions before any session.
Building a Landscape Photography Portfolio That Actually Gets Noticed Online
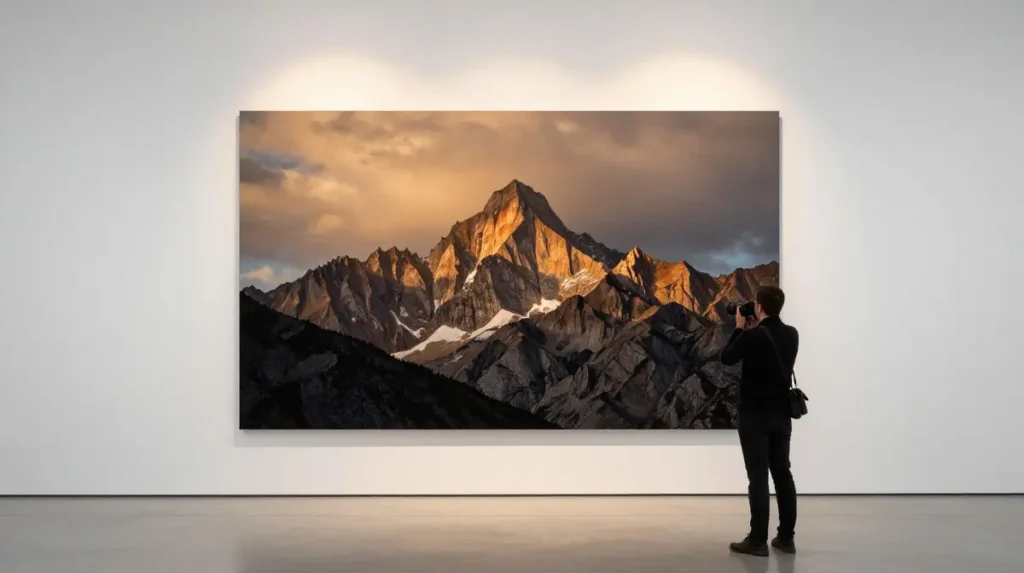
Fine art photography portfolio building for landscape work requires ruthless editing of your own output — displaying 200 images tells viewers you can’t distinguish your best from your mediocre work. Twenty extraordinary images presented with consistent aesthetic intentionality communicates mastery. 500px landscape photography community and ViewBug landscape photography contests both provide competitive context for understanding where your work stands against active practitioners globally — enter regularly and study what wins rather than simply what you personally prefer.
Travel photography techniques for building portfolio diversity require deliberate geographic diversification — a portfolio that only shows one region, one terrain type or one season reads as limited regardless of individual image quality. Build your portfolio across at least four distinct terrain types: mountain, coastal, desert and forest. National Geographic landscape photography standards for submission require images that combine technical excellence with genuine narrative power — your portfolio should aim for that dual standard even if submission to National Geographic isn’t your immediate goal because shooting toward that standard consistently raises your ceiling.
How to Sell Landscape Photos and Turn a Passion Into Sustainable Income
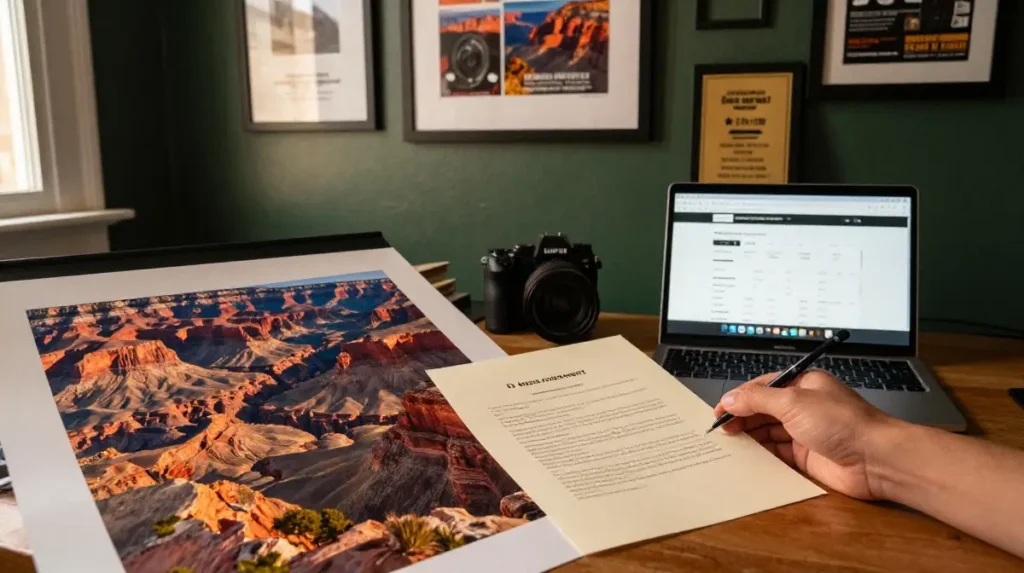
Selling landscape photography images requires understanding that the market has five distinct channels each with different economics, different requirements and different creative implications. Stock photography through agencies like Getty Images, Shutterstock and Adobe Stock provides passive income from a large catalog but pays low per-image rates — typically $0.25 to $1.50 per download for non-exclusive microstock content. Landscape photography fine art prints sold directly through your own website or platforms like Etsy command dramatically higher margins — a 20×30 inch museum-quality print selling for $350 carries $60 to $80 in production cost leaving substantial margin per sale.
Licensing for editorial use — books, magazines, advertising campaigns and corporate publications — delivers the highest per-image revenue but requires active client relationship development. Landscape photography equipment rental income represents an overlooked revenue stream — your gear works for you between personal shooting sessions through platforms like ShareGrid and KitSplit. Teaching workshops at locations you know intimately provides income, builds community and forces you to articulate your own creative process at a level of clarity that improves your photography independent of any financial benefit.
Landscape Photography Ethics: Leave No Trace and Protect What You Shoot
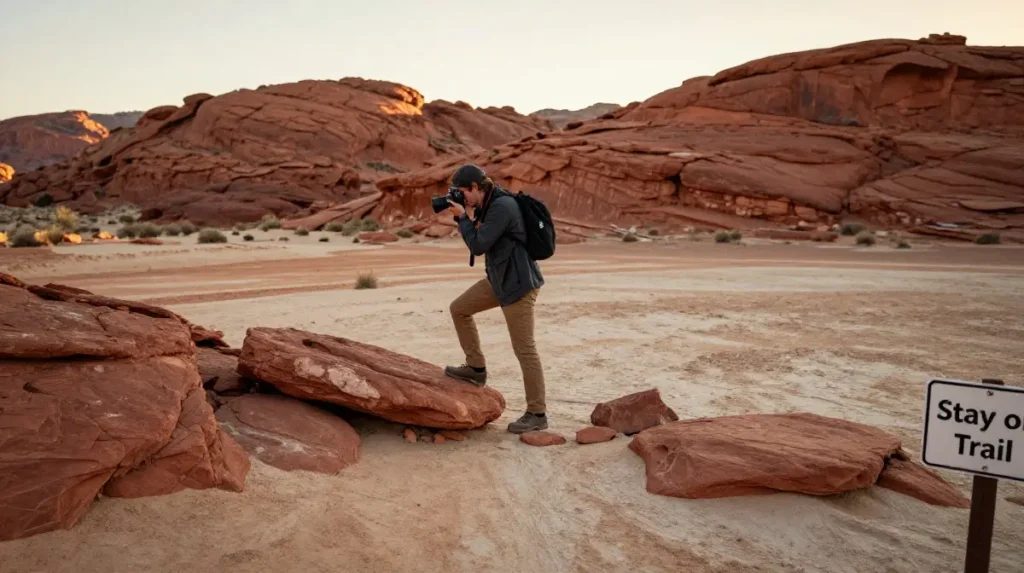
The landscape photography community has caused measurable environmental damage at specific locations where social media viral images drove unsustainable visitor traffic to fragile ecosystems. The wave formation in The Wave, Arizona receives 64,000 permit applications annually for 96 daily visitor slots — that pressure exists primarily because photographers shared location data publicly. Geotagging specific coordinates of sensitive locations accelerates degradation that takes geological timescales to reverse.
Environmental photography ethics require photographers to operate as active stewards rather than passive consumers of wild places. Stay on established trails regardless of what a better composition might require from off-trail terrain. Never move, remove or rearrange natural objects for compositional convenience. Wilderness photography at locations under pressure means limiting social media exposure to general regions rather than pinpoint GPS coordinates — a practice called location blurring that the photography community has slowly adopted as habitat destruction consequences became impossible to ignore. The images you protect by not publicizing their location remain available for future photographers to discover and document on their own terms.
FAQ Section
Q1. What is the best camera setting for landscape photography?
Start with aperture f/8 to f/11 for peak sharpness, ISO 64 to 100 in good light and shutter speed determined by your exposure meter with histogram verification. Always shoot RAW files rather than JPEG to preserve full dynamic range for post-processing. Use manual mode once you understand the exposure triangle — it gives you complete control that aperture priority mode cannot provide in rapidly changing light conditions.
Q2. What time of day produces the best landscape photos?
Golden hour — the first and last hour of sunlight — delivers the warmest, most directional light for landscape work consistently. Blue hour immediately before sunrise and after sunset produces cooler tones and balanced exposure across sky and land. The pre-dawn period from 45 minutes before sunrise often produces dramatic cloud formations and color gradients that peak golden hour doesn’t replicate. Midday shooting is possible but requires specific techniques and creative approaches to produce compelling results.
Q3. Do I always need a tripod for landscape photography?
A tripod is essential for long exposure work, dawn and dusk shooting and any scenario where shutter speed drops below the reciprocal of your focal length. Handheld shooting works perfectly in bright daylight at fast shutter speeds — modern image stabilization systems in cameras like the Sony A7R V landscape camera compensate for multiple stops of camera movement making handheld work viable in many conditions. However for maximum sharpness at base ISO and for any exposure exceeding 1/60 second a quality tripod remains non-negotiable.
Q4. What is the best lens focal length for landscape photography?
Wide angle focal lengths between 16mm and 35mm on full frame sensors handle the majority of landscape scenarios — they capture expansive sky, accommodate strong foreground interest and convey the spatial scale of wilderness environments effectively. A 24-70mm versatile zoom covers both wide landscape establishing shots and medium telephoto detail captures from a single lens. Telephoto lenses in the 70-200mm range excel for compressing distant mountain ranges and isolating specific landscape elements against atmospheric backgrounds.
Q5. How do I make my landscape photos look more professional?
Professional landscape images share several characteristics: complete front-to-back sharpness using hyperfocal distance or focus stacking, intentional foreground interest that creates three-dimensional depth, light shot during the first or last two hours of the day, careful horizon leveling and post-processing that enhances rather than replaces the scene’s natural qualities. Shoot RAW, invest in quality glass, use a solid tripod for low-light situations and develop a consistent Adobe Lightroom landscape editing workflow that you apply deliberately rather than reactively.
Conclusion
Landscape photography is simultaneously the most accessible and the most demanding photographic discipline available to any practitioner willing to take it seriously. The earth provides the subjects. Light provides the medium. Your preparation, patience and technical understanding determine what you extract from the infinite possibilities that exist in every landscape at every hour of every day across every season.
Start with the fundamentals — understand your camera settings, invest in a quality tripod, learn the golden hour schedule for your local area and begin shooting the landscapes within an hour of your home before pursuing destinations across the country. The photographers who produce the most consistently extraordinary work aren’t necessarily those with access to the most spectacular locations. They’re the ones who return to the same places repeatedly until they understand them deeply enough to anticipate the precise conditions that produce the images they’ve pre-visualized. That level of commitment, sustained over years, is what the genre ultimately demands and ultimately rewards.